Catalogs, External Locations and Storage Credentials
In the previous lecture, we set up the workspace and metastore side of our Unity Catalog requirement — three workspaces (Dev, UAT, Prod), all connected to one shared metastore. In this lecture, we'll complete the second half: catalogs, external locations, and storage credentials, connecting everything to our own S3 buckets.
Recap of the Requirement
- A Dev catalog, accessible to Development and UAT teams, storing its data in External Location 1, backed by S3 Bucket 1.
- A Production catalog, accessible only to the Production team, storing its data in a separate External Location 2, backed by a separate S3 Bucket 2 — fully isolated from dev/test data.
Unlike the workspace/metastore setup (which required account admin access), this part can be done directly from within a workspace — no account admin privileges required.
Step 1: Create the S3 Buckets
Log into your AWS Console (as your IAM user, not root), go to S3, and create two buckets:
dbx-course-dev-storage-bucket-s3dbx-course-prod-storage-bucket-s3
(Bucket names must be globally unique, so add your own suffix/identifier if needed.) No special configuration is required for either bucket at this stage — plain, empty S3 buckets.
Step 2: Understand What Comes Next
To let Databricks/Unity Catalog actually read and write to these buckets, we need three things, built in this order:
- A Storage Credential — an AWS IAM role that grants Databricks permission to access a given S3 path.
- An External Location — a Unity Catalog object that pairs an S3 path with a storage credential, formally registering "Databricks is now allowed to use this location."
- A Catalog — which we then point at that external location, so anything created inside the catalog is stored there.
Step 3: Create a Storage Credential (and the IAM Role Behind It)
From your workspace, go to Catalog → External Data → Credentials, and create a new Storage Credential. Databricks makes this easier than doing it manually in IAM — it generates a ready-to-use AWS CloudFormation template for you.
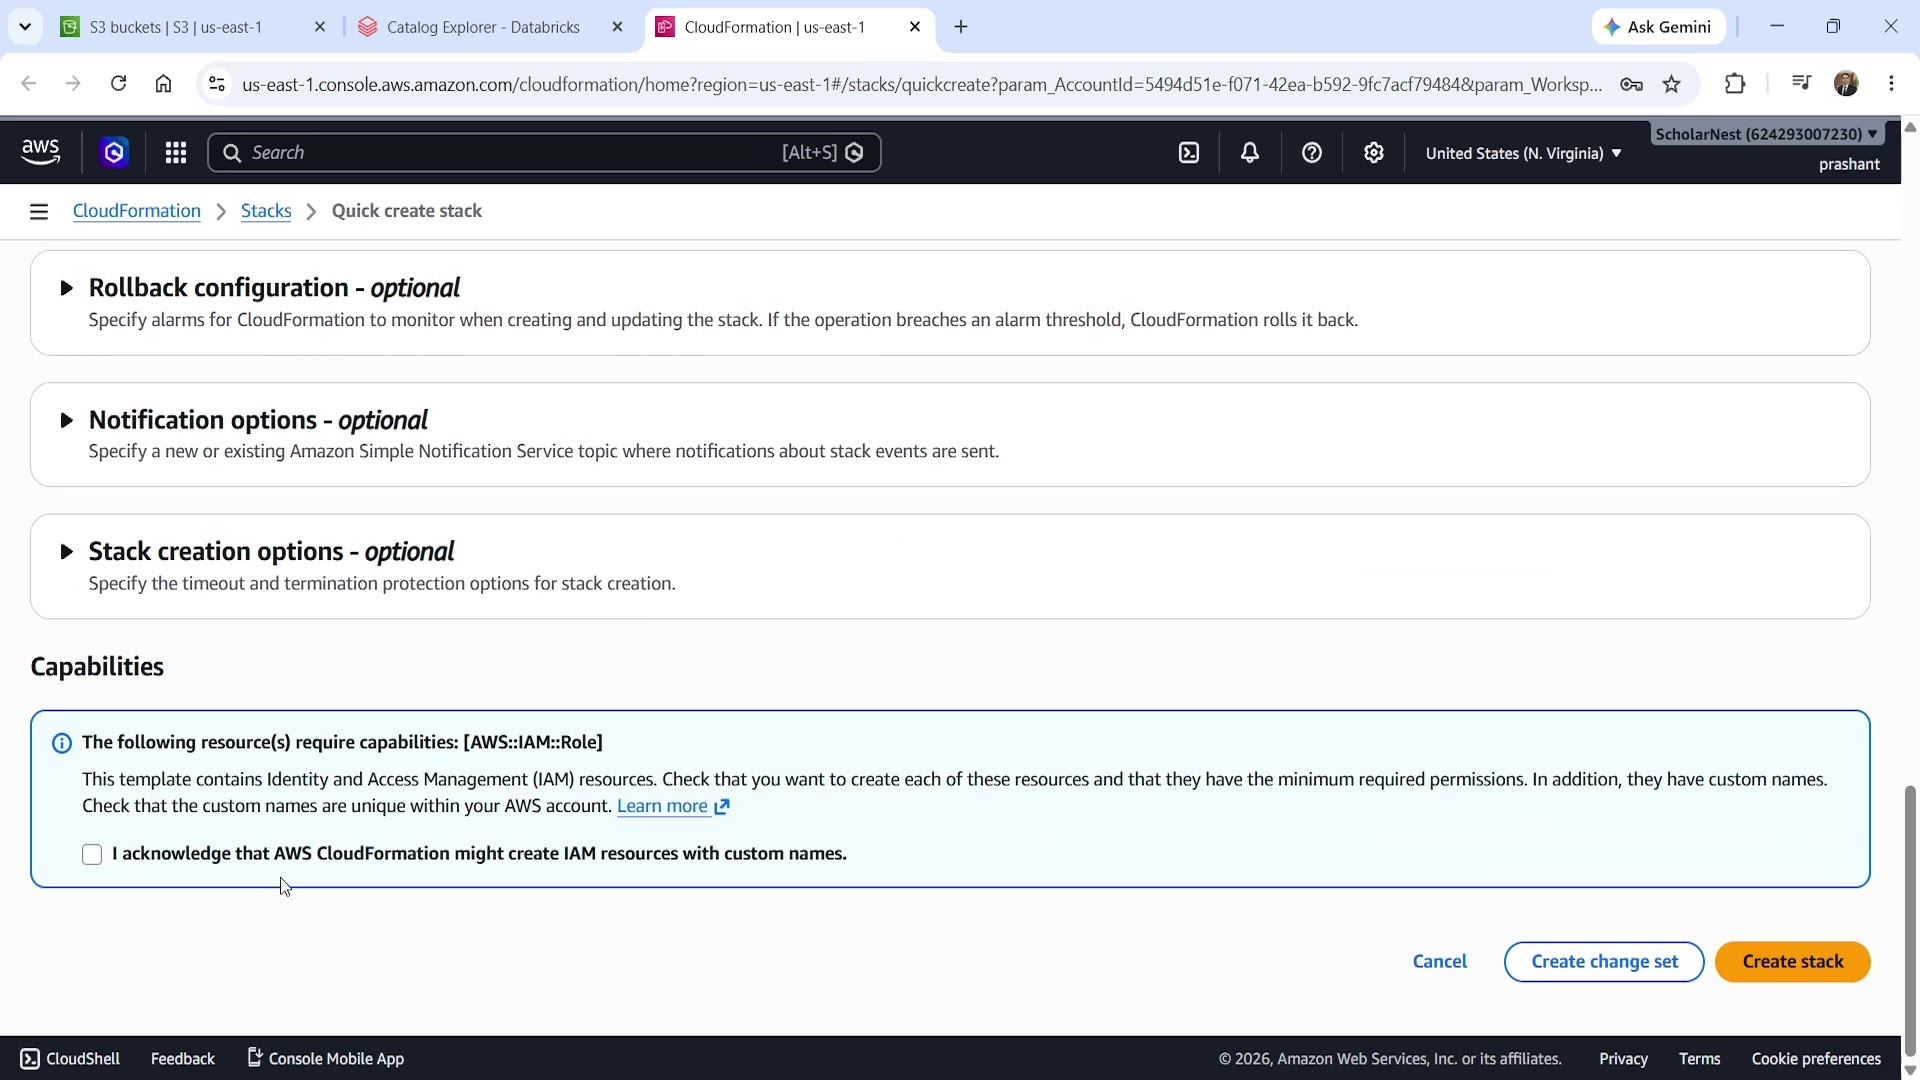 AWS CloudFormation — Quick create stack for the IAM role
Databricks opens this CloudFormation quick-create page automatically, pre-filled with everything needed: the correct trust policy (allowing Databricks' AWS account to assume this role), and the necessary S3 permissions. You just need to acknowledge the IAM resource creation checkbox and click Create stack. CloudFormation then provisions the IAM role for you — no manual trust policy editing required.
Once the stack finishes, return to Databricks — the storage credential is now created and ready to use, referencing this newly created IAM role.
Step 4: Create an External Location
Next, go to Catalog → External Data → External Locations, and click Create external location. You can either use Databricks' guided/automatic flow, or configure it manually:
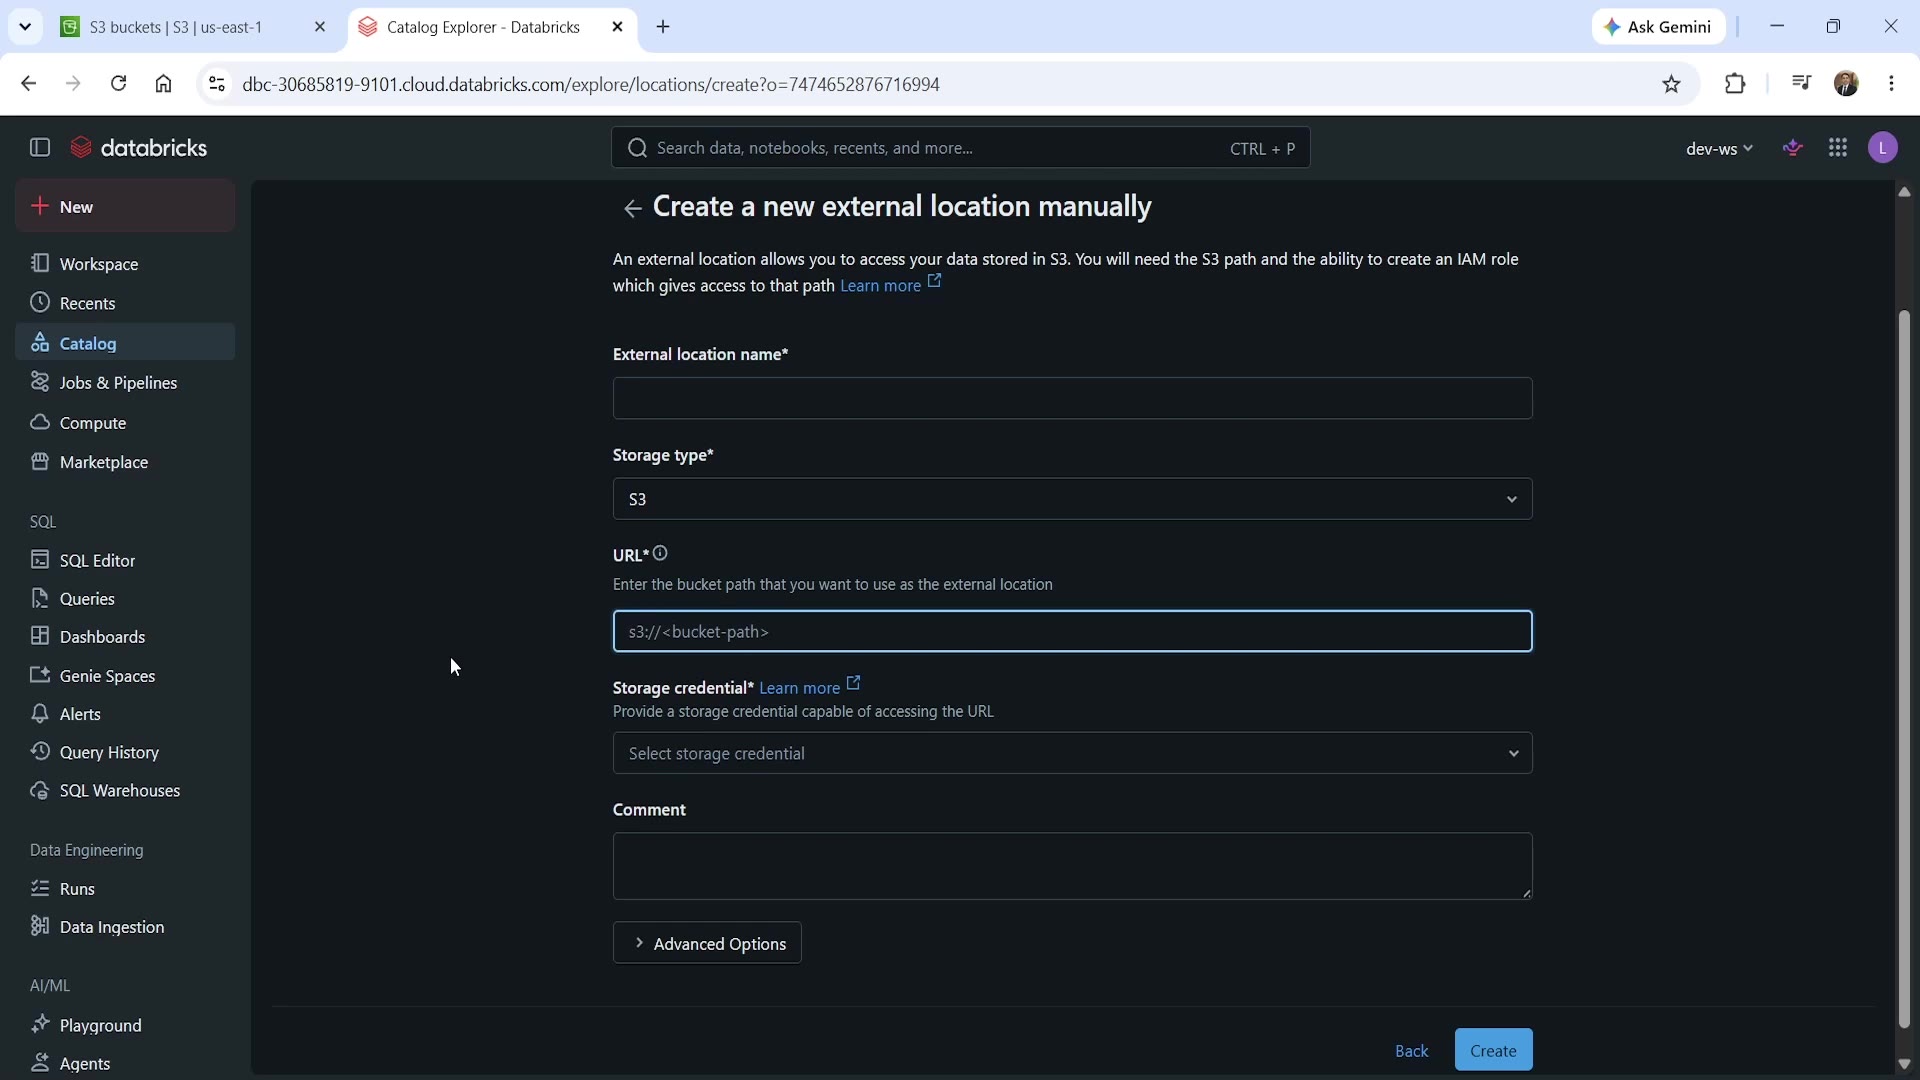 Create external location form
- External location name — a name for this registration (e.g.,
dev_external_root_databricks_s3). - Storage type —
S3. - URL — the S3 bucket path this location should point to, e.g.,
s3://dbx-course-dev-storage-bucket-s3/. - Storage credential — select the storage credential (IAM role) you created in Step 3.
Repeat this for the second bucket, creating a separate external location pointing at dbx-course-prod-storage-bucket-s3.
Once created, opening the external location's details confirms everything is correctly linked:
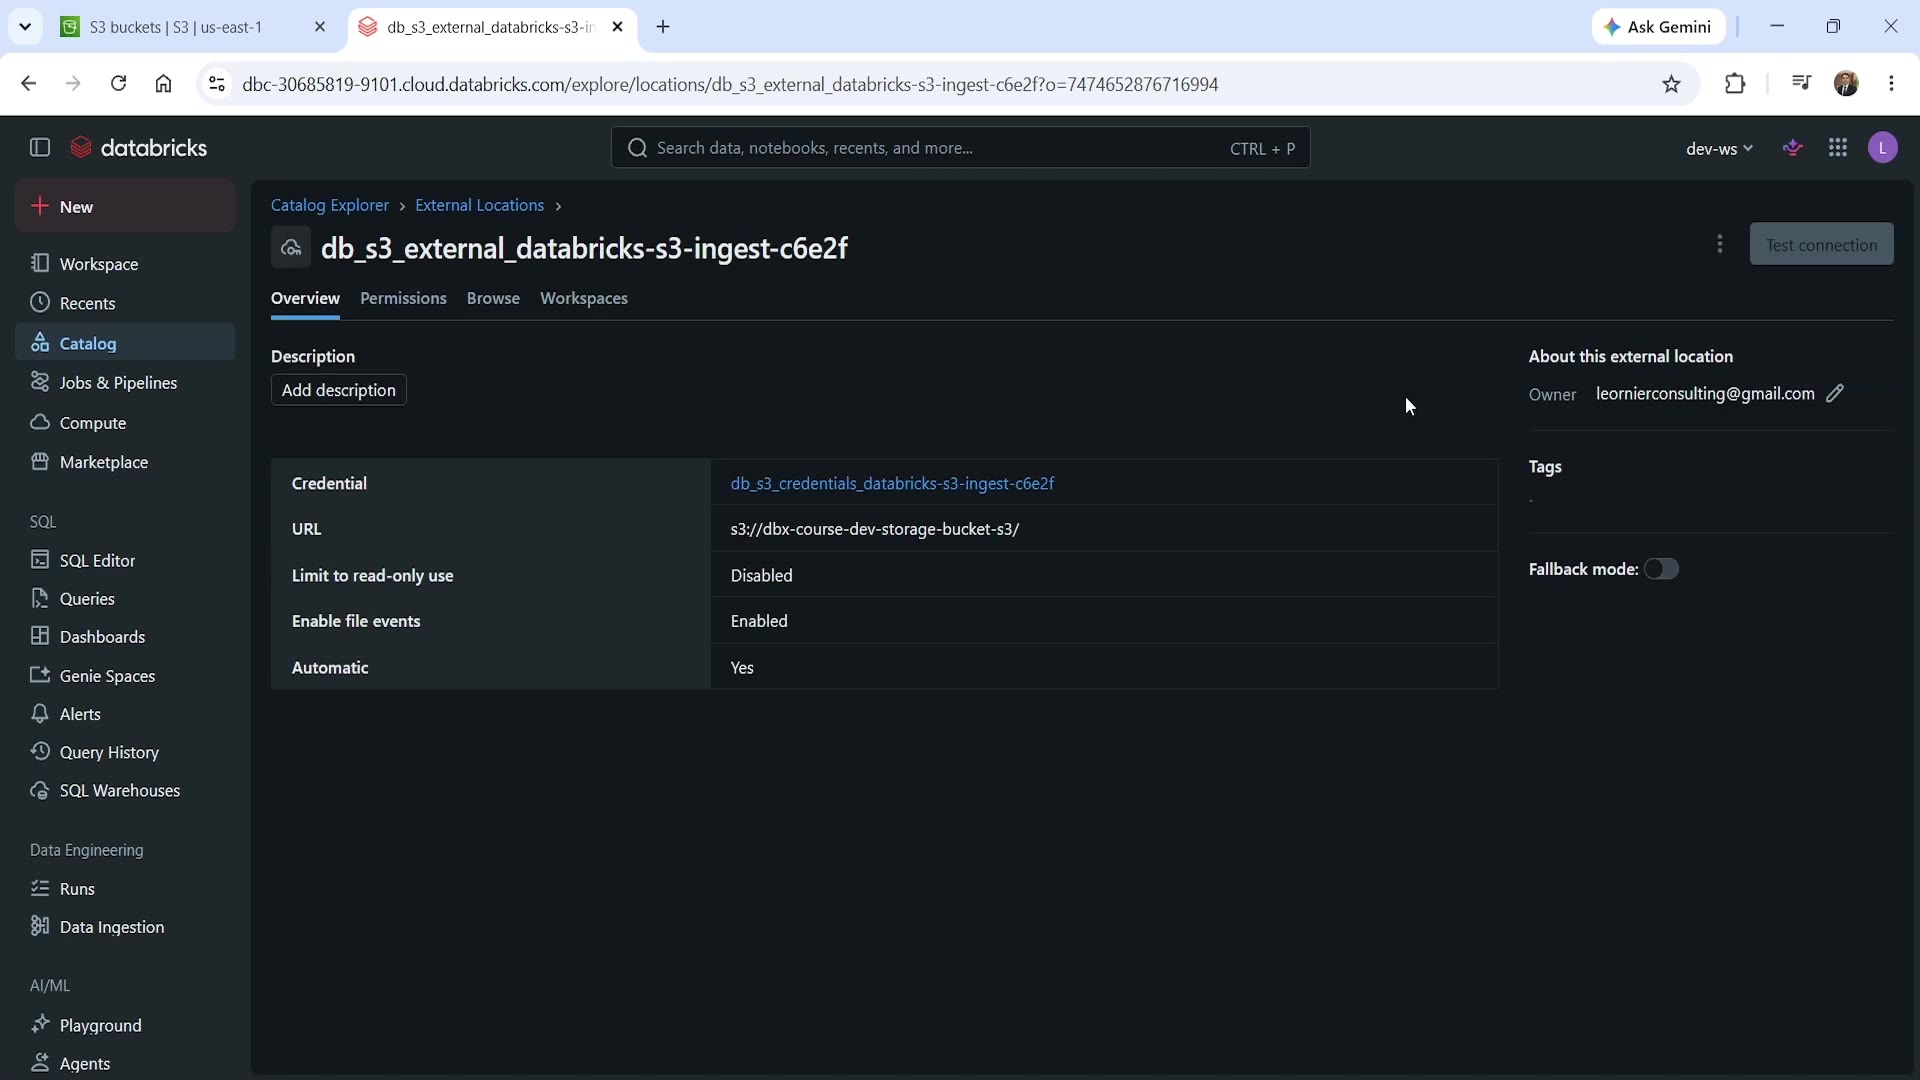 External location — created and linked to its credential
You can see the Credential it's using, the URL it points to, and settings like read-only mode and file events. You can also click Test connection to confirm Databricks can actually reach the bucket using this setup.
Step 5: Create the Catalogs
Now, finally, create the catalogs themselves. Go to Catalog → Create catalog:
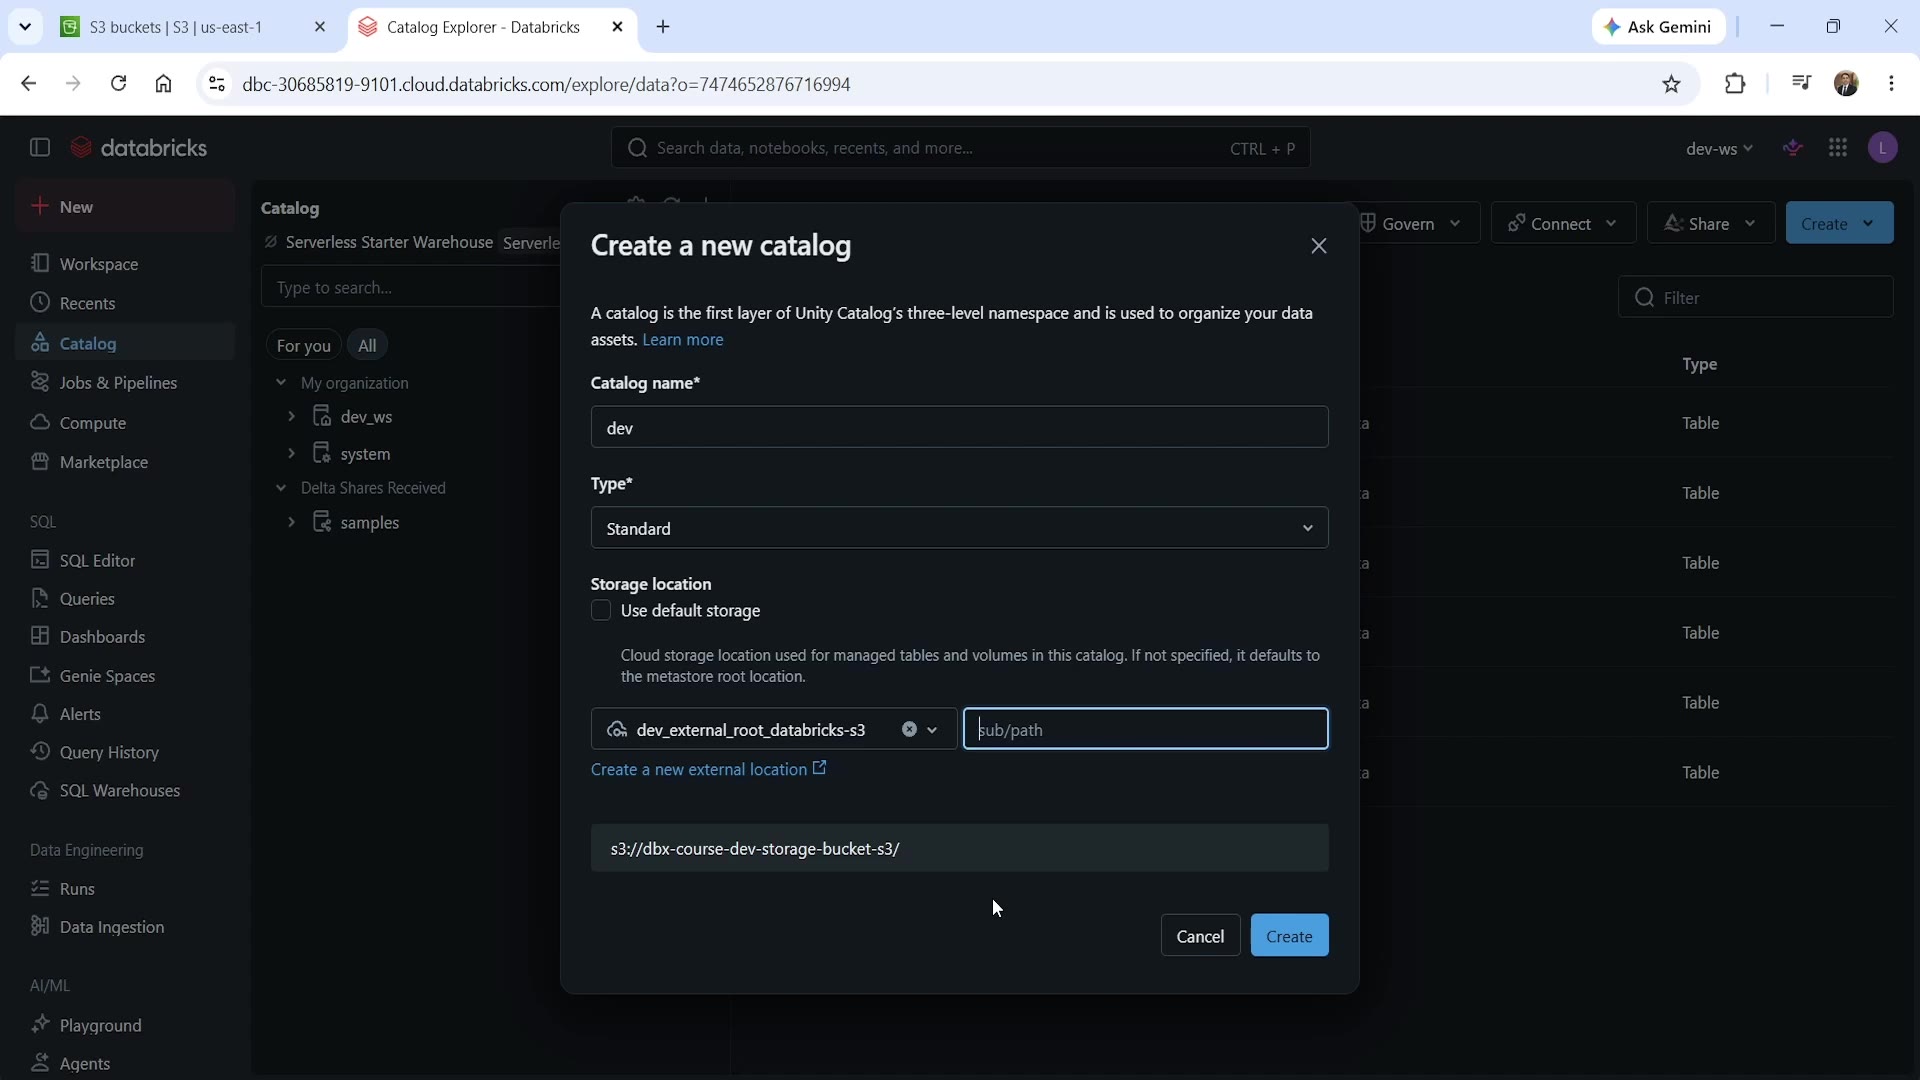 Create a new catalog dialog
- Catalog name —
dev. - Type —
Standard. - Storage location — instead of using default metastore storage, select your external location (
dev_external_root_databricks_s3) from Step 4. Databricks shows you the resolved S3 path this catalog will store its data in — confirming it matches the bucket you intended.
Click Create. Repeat the same process for a prod catalog, pointing it at your second external location (the one backed by the prod S3 bucket).
Step 6: Assign Catalogs to the Right Workspaces
The last piece of our requirement: the Dev catalog should be accessible to both Development and UAT workspaces, while the Prod catalog should be accessible only to Production.
From the account console (or directly from the catalog's permissions in the workspace), assign:
devcatalog → Dev workspace and UAT workspace.prodcatalog → Prod workspace only.
This completes the access boundary: development and testing work stays isolated from production, even though everything lives under the same shared metastore.
What We Built
Putting Steps 1 through 6 together, here's the full picture we now have in place:
- One metastore, shared across three workspaces (Dev, UAT, Prod).
- Two catalogs (
dev,prod), each backed by its own external location and its own S3 bucket — fully isolated storage. - Two storage credentials (IAM roles), each scoped to grant access to just its own bucket.
- Catalog-to-workspace assignment enforcing that dev/test teams can't touch production data, and vice versa.
This is a genuinely production-realistic Unity Catalog setup — the same pattern you'd use to structure governance and storage isolation across environments in a real organization.
Summary
| Object | Purpose | Created Via |
|---|---|---|
| Storage Credential | An IAM role granting Databricks access to a specific S3 path | Catalog → External Data → Credentials (Databricks auto-generates a CloudFormation template) |
| External Location | Registers a specific S3 path + storage credential pair as usable by Unity Catalog | Catalog → External Data → External Locations |
| Catalog | The top-level namespace object; storage location determines where its managed data physically lives | Catalog → Create catalog, pointing at an external location |
| Workspace-to-catalog assignment | Controls which workspaces can see/use which catalogs | Account console, or catalog permissions |
See you again. Keep learning, and keep growing!