Implementing Unity Catalog Architecture
In the previous lecture, we covered the Unity Catalog architecture conceptually — metastore, catalog, schema, tables, external location, and how workspaces relate to all of it. Now it's time to put that into practice.
Defining the Requirement
Let's set up a realistic scenario: you're running a data engineering project on Databricks, organized into three teams — Development, Testing (UAT), and Production. It's typical practice to give each team its own workspace, so we need:
- A Dev workspace
- A UAT workspace
- A Prod workspace
All three exist under the same Databricks account, and all three need access to Unity Catalog capabilities. So we'll connect all three workspaces to one shared metastore.
On top of that, we want to structure the data itself:
- One Dev catalog — accessible to both the Development and Testing teams (all dev and test data lives here).
- One Production catalog — accessible only to the Production team.
- Dev catalog data should be stored in External Location 1, backed by S3 Bucket 1 — in our own AWS account, not inside Databricks' storage.
- Production catalog data should be stored in a completely separate External Location 2, backed by a separate S3 Bucket 2 — keeping production data fully isolated from dev/test data.
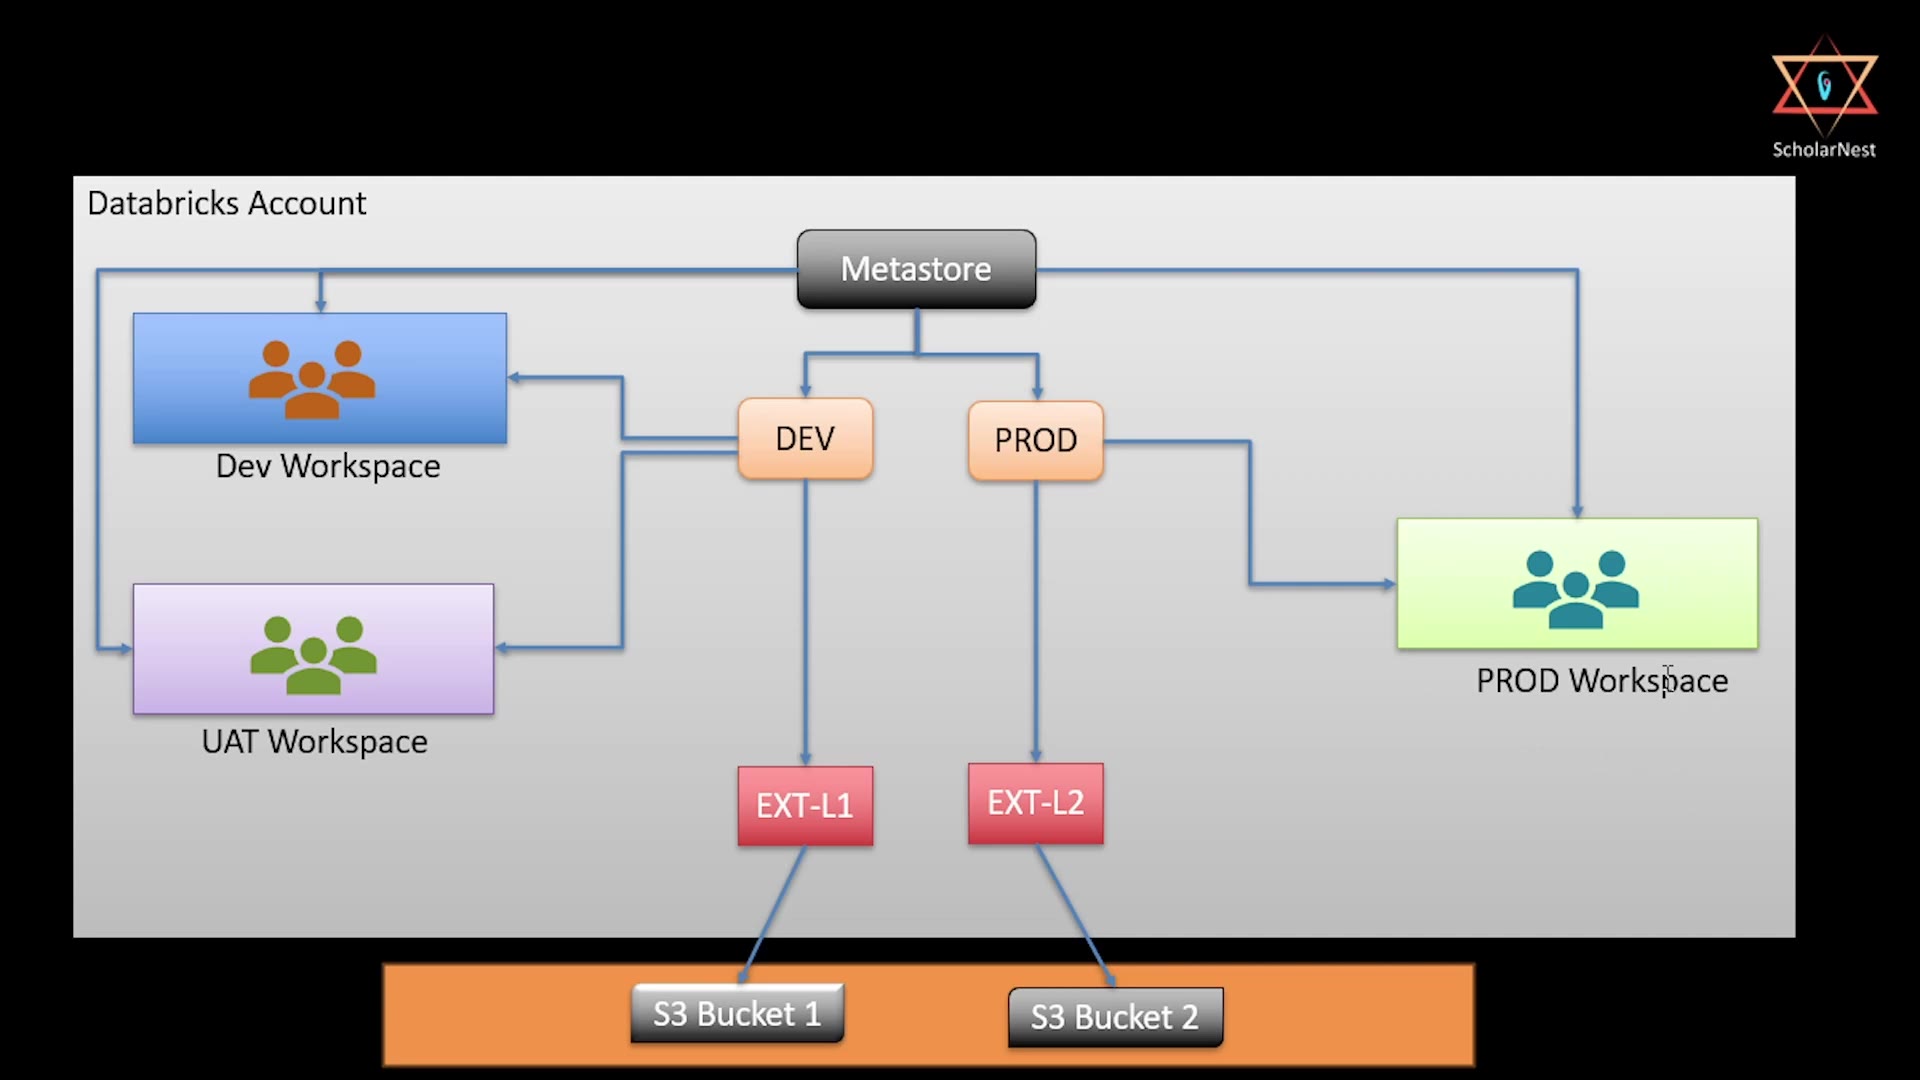 Databricks Account requirement diagram
This requirement splits into two parts:
- Workspace and metastore setup — creating the three workspaces, and connecting them to a shared metastore. This is Databricks account admin work.
- Catalog and external location setup — the actual Unity Catalog structuring (catalogs, external locations, permissions). This is not account-admin-only work — it can be done by your team, from within a workspace.
In this lecture, we'll implement Part 1. Part 2 (catalogs and external locations) comes in the next lecture.
Step 1: Log Into the Account Management Console
Go to accounts.cloud.databricks.com, and sign in with the email address you used when creating your Databricks account (since that's your account admin identity). Verify with the code sent to your email, and you'll land in the Account Management Console.
Step 2: Check Your Existing Workspaces
Go to the Workspaces menu. You should already see at least one workspace — Databricks automatically creates one when you first set up your account.
Since our requirement calls for three specific workspaces (Dev, UAT, Prod), let's create them.
Step 3: Create the Three Workspaces
Click Create workspace, and for each one:
- Name: e.g.,
dev-ws,uat-ws,prod-ws. - Region: choose the same region for all three — in this case, US East 1 (North Virginia) — so the whole team works consistently in one region.
- Workspace type: Serverless (matching this project's requirement — though classic/hybrid is available if your project needs it).
Repeat this for all three workspaces. Each takes a little time to provision — you can create the next one while the previous is still finishing.
Step 4: Check the Metastore
Go to Catalog in the account console. You'll typically find one metastore already exists — created automatically when your Databricks account (and its first workspace) was first set up, in whichever region that first workspace used.
Since our team is working in US East 1, and a metastore already exists there, we don't need to create a new one — we'll simply reuse it. (Note: you can create additional metastores if needed, but only one metastore per region is allowed within a single Databricks account. If you did need to create one, you'd only need to provide a name and a region — everything else is optional.)
Step 5: Confirm Workspace-to-Metastore Connections
The last piece: make sure all three new workspaces are actually connected to this metastore.
Open the metastore, and go to its Workspaces tab:
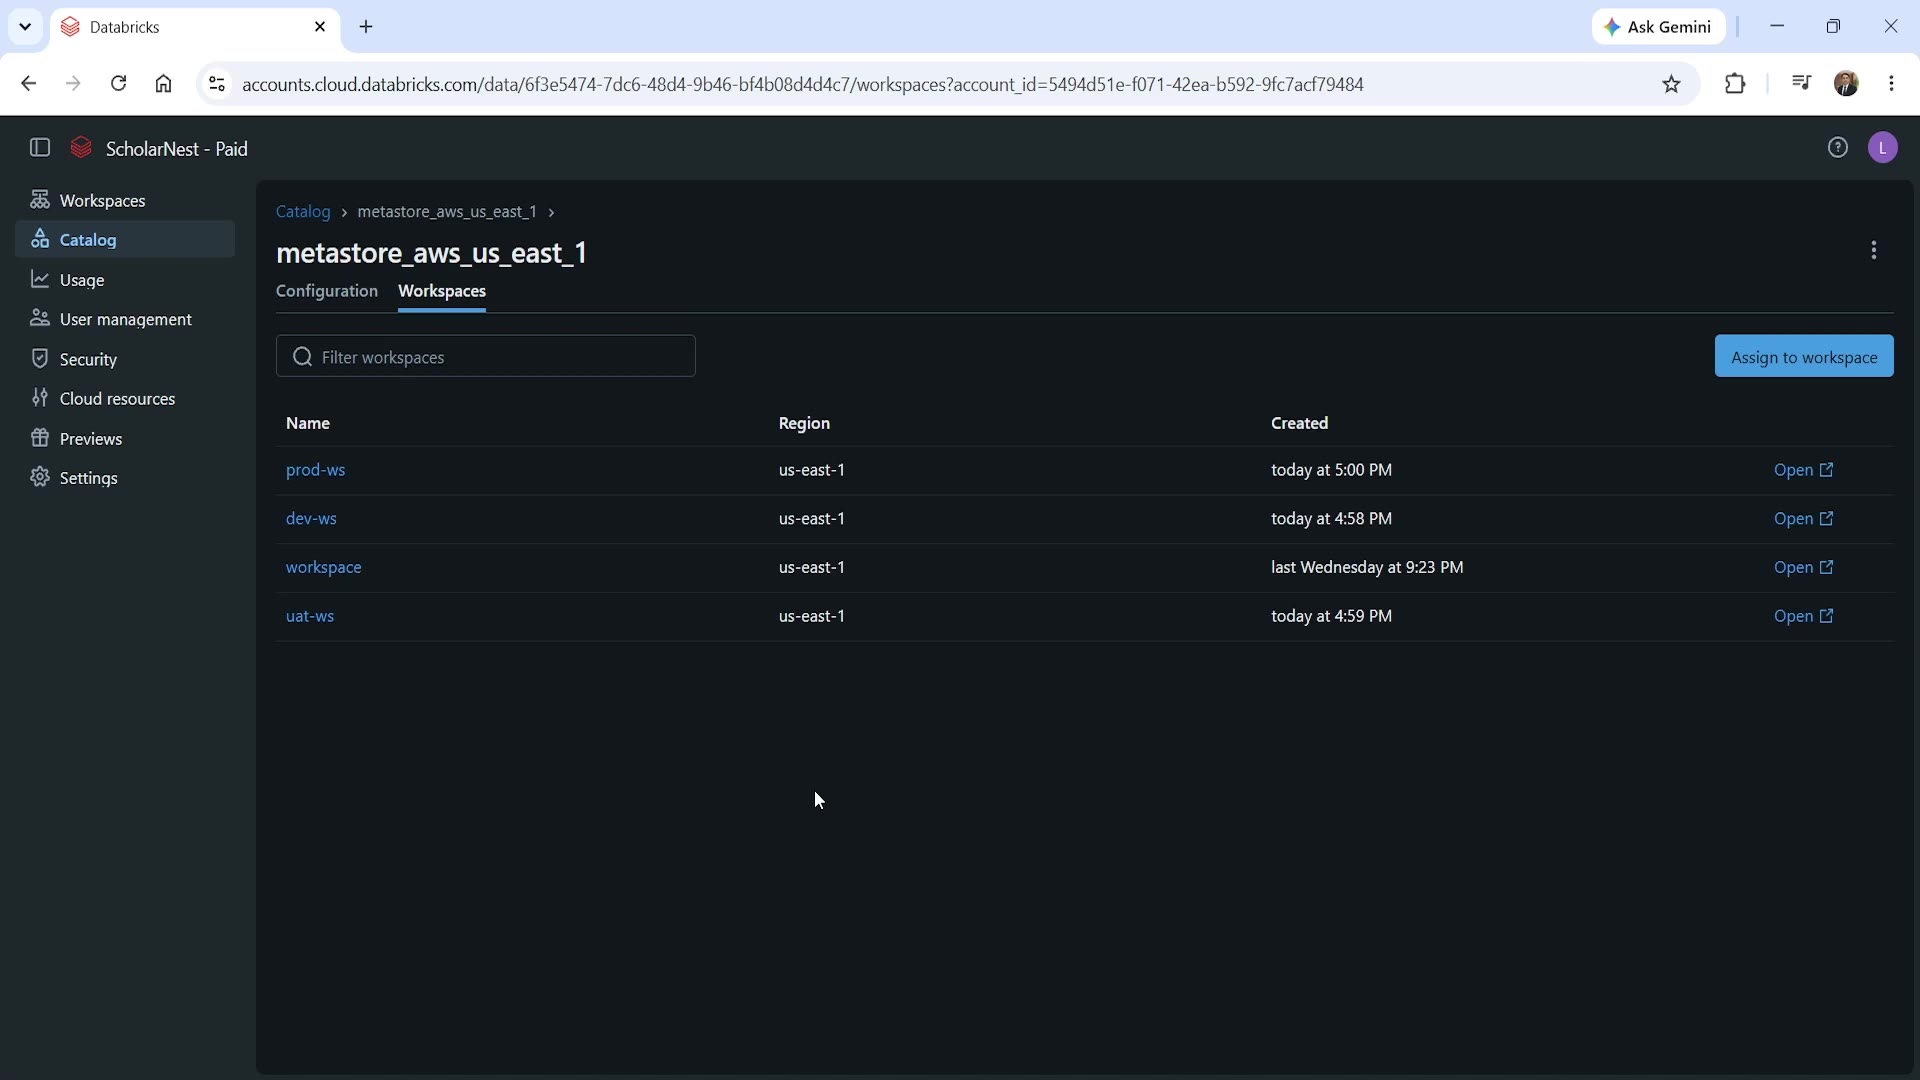 Metastore's Workspaces tab, showing all connected workspaces
In most cases, you'll find all your workspaces already connected automatically — this happens because, when there's only one metastore in a region, new workspaces created in that region are auto-assigned to it by default (controlled by a setting called "automatically assign new workspaces in this metastore," which is typically enabled by default).
If a workspace isn't connected for some reason, you can connect it manually: from the metastore's Workspaces tab, click Assign to workspace, and select the workspace you want to connect.
Confirming the Result
At this point, checking the metastore's Workspaces tab (or the account-level Workspaces list) should show all your workspaces — dev-ws, uat-ws, prod-ws, plus the original default workspace — all pointing to the same metastore (metastore_aws_us_east_1 in this example). That confirms Part 1 of our requirement is complete: three team-specific workspaces, all sharing access to a single Unity Catalog metastore.
What's Next
We've now completed the account admin portion of the setup. In the next lecture, we'll implement the second part — creating the Dev and Production catalogs, setting up their external locations, and connecting them to their respective S3 buckets. Unlike this lecture, that work doesn't require account admin privileges — it can be done directly from within a workspace by your team.
Summary
| Step | What You Do | Who Does It |
|---|---|---|
| 1–2 | Log into the Account Management Console, review existing workspaces | Account admin |
| 3 | Create Dev, UAT, and Prod workspaces (same region, serverless) | Account admin |
| 4 | Check for an existing metastore in your target region — reuse if present | Account admin |
| 5 | Confirm (or manually assign) each workspace's connection to the metastore | Account admin |
| Next lecture | Create catalogs, external locations, connect to S3 buckets | Can be done by your team, not just account admin |
See you again in the next lecture, where we'll implement the rest of the structure. Keep learning, and keep growing!