Implementing Users, Groups, and Access Control
In the previous lectures, we set up the workspace/metastore layer and the catalog/external-location layer of our Unity Catalog environment. Now let's put people (and automation) into it — creating users, groups, and a service principal, and granting them the right access.
The Requirement
Here's what we're implementing in this lecture:
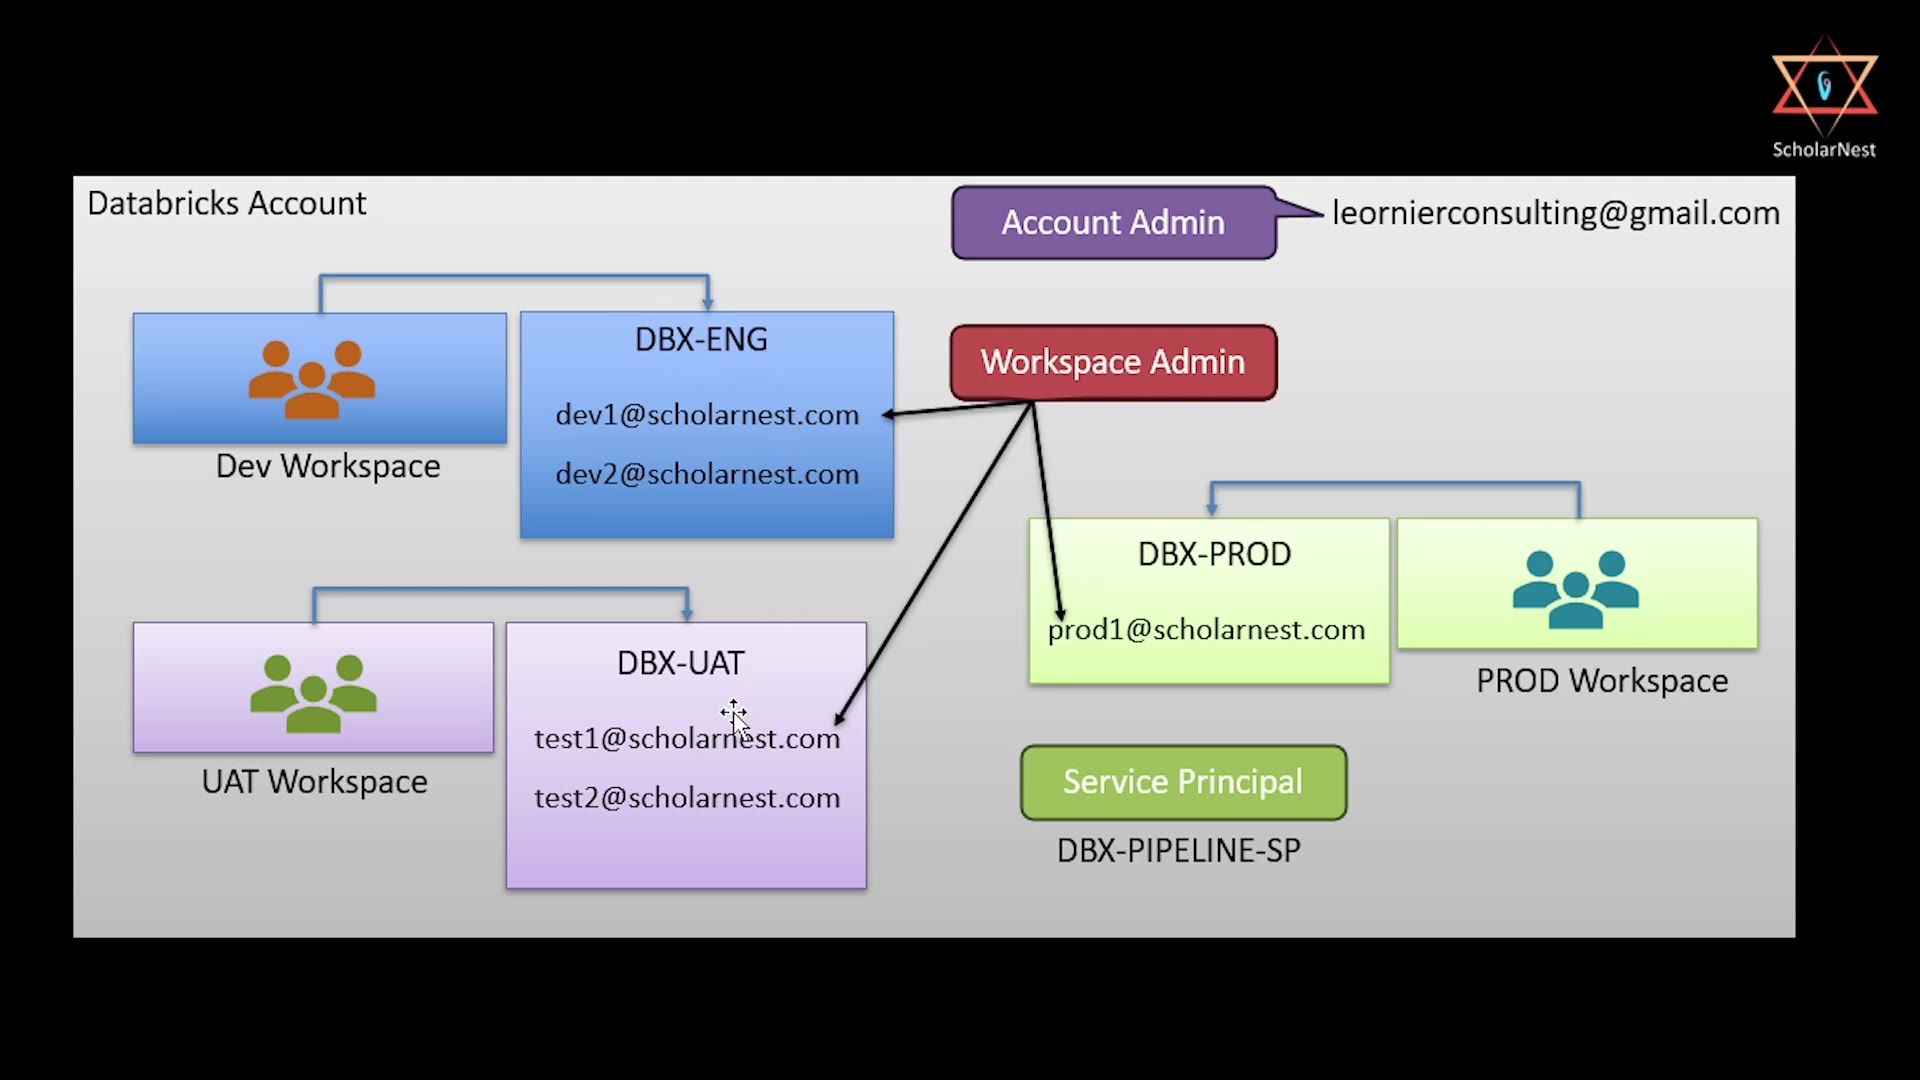 Identity requirement diagram — users, groups, and service principal
- Account Admin — your own account owner identity (e.g., the email you signed up with).
- DBX-ENG group — containing two development users,
dev1@...anddev2@...— needs access to the Dev Workspace. - DBX-UAT group — containing two testing users,
test1@...andtest2@...— also needs access to the Dev Workspace (recall: dev and UAT teams share the dev catalog/workspace in our design). - DBX-PROD group — containing one production user,
prod1@...— needs access to the Prod Workspace. - A Workspace Admin role, assigned to manage both workspaces.
- A Service Principal,
DBX-PIPELINE-SP— representing an automated pipeline, not a human.
Step 1: Create Users
From the Account Management Console, go to User management → Users, and click Add user. For each user, provide their email address — this becomes their identity.
For this demo, we'll create 5 users total: dev1, dev2 (development team), test1, test2 (UAT/testing team), and prod1 (production team) — using whatever email domain is available to you.
Each new user receives an invitation email to set up their account and join your Databricks account.
Step 2: Create Groups
Rather than assigning permissions to five individual users one by one, we'll organize them into groups — this is exactly the kind of scenario groups exist for.
Go to User management → Groups, and click Add group:
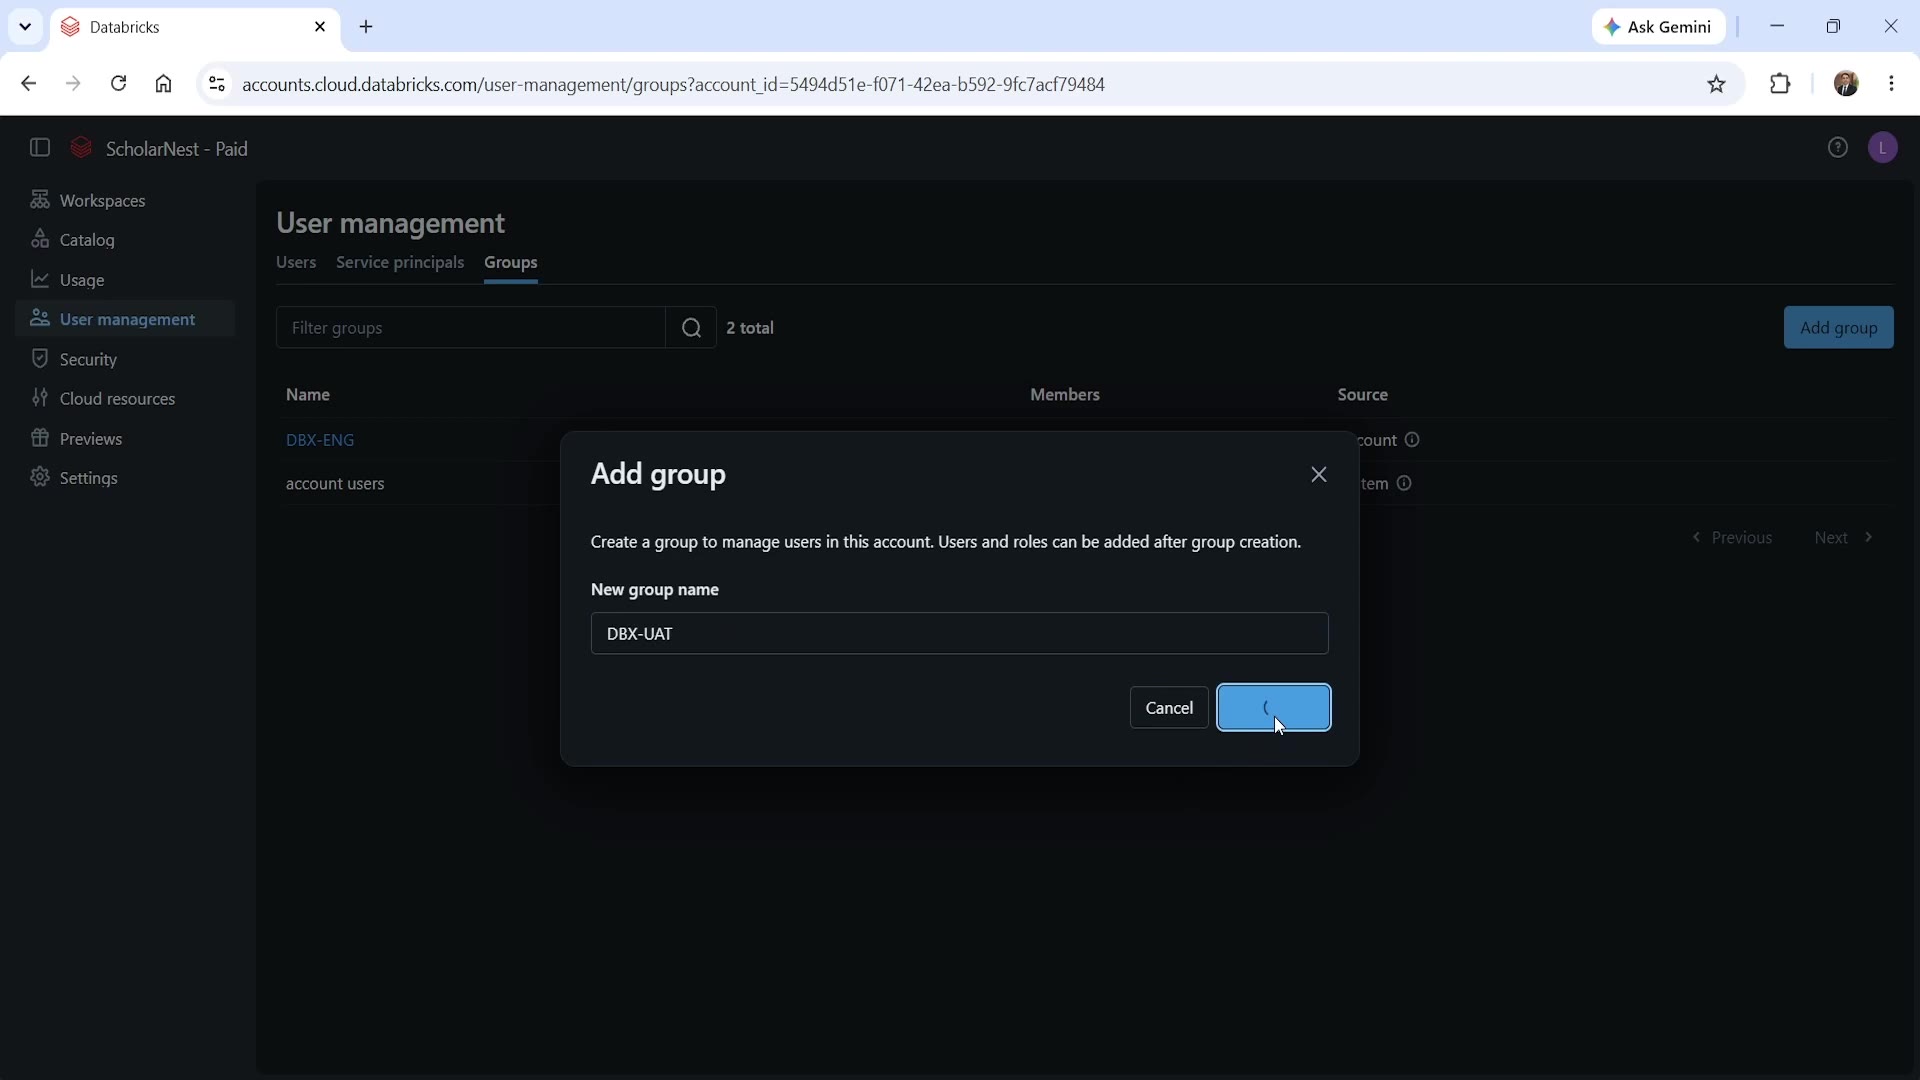 Add group dialog
Create three groups:
- DBX-ENG — for the development team.
- DBX-UAT — for the testing team.
- DBX-PROD — for the production team.
Step 3: Add Users to Groups
Open each group, and add the appropriate users as members:
- DBX-ENG →
dev1,dev2 - DBX-UAT →
test1,test2 - DBX-PROD →
prod1
Once done, each group's member list should reflect exactly the users assigned to that team.
Step 4: Create a Service Principal
Not everything that needs access to Databricks is a human. Automated pipelines, CI/CD jobs, and scheduled processes need their own identity too — that's what a service principal is for.
Go to User management → Service principals, and create one named DBX-PIPELINE-SP (representing, for example, an automated ingestion or transformation job).
Once created, a service principal has its own dedicated management tabs:
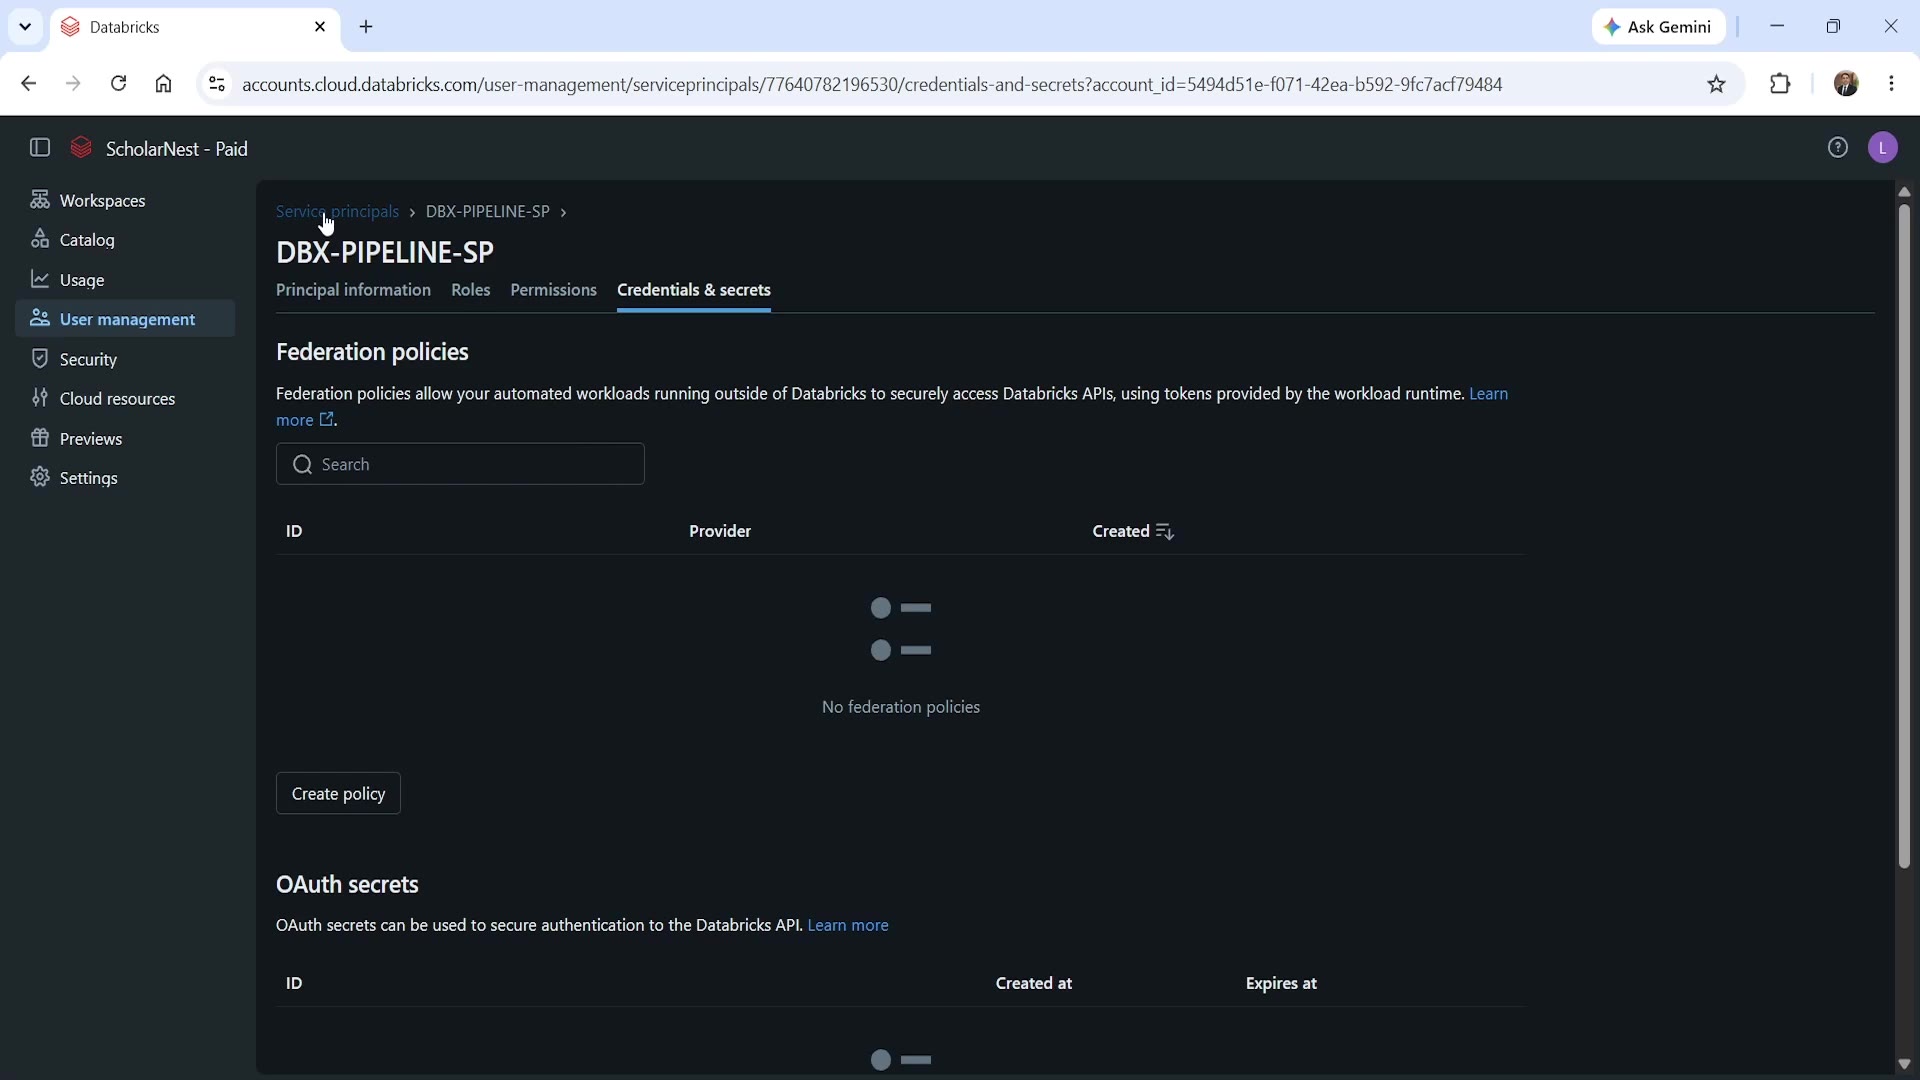 Service principal — Credentials & secrets tab
- Principal information — basic identity details.
- Roles — account-level roles this service principal holds.
- Permissions — workspace/resource-level access.
- Credentials & secrets — this is how the service principal actually authenticates. You can set up federation policies (letting automated workloads running outside Databricks securely access Databricks APIs using tokens from their own runtime — no static secrets needed), or generate OAuth secrets directly, for workloads that need a traditional client credential.
Step 5: Assign Groups to Workspaces
Creating users and groups at the account level doesn't automatically give them access to any specific workspace — that connection has to be made explicitly, just like we did for catalogs earlier.
Go to your workspace (e.g., dev-ws) in the account console, open its Permissions tab, and click Add permissions. Search for and add the groups that should have access:
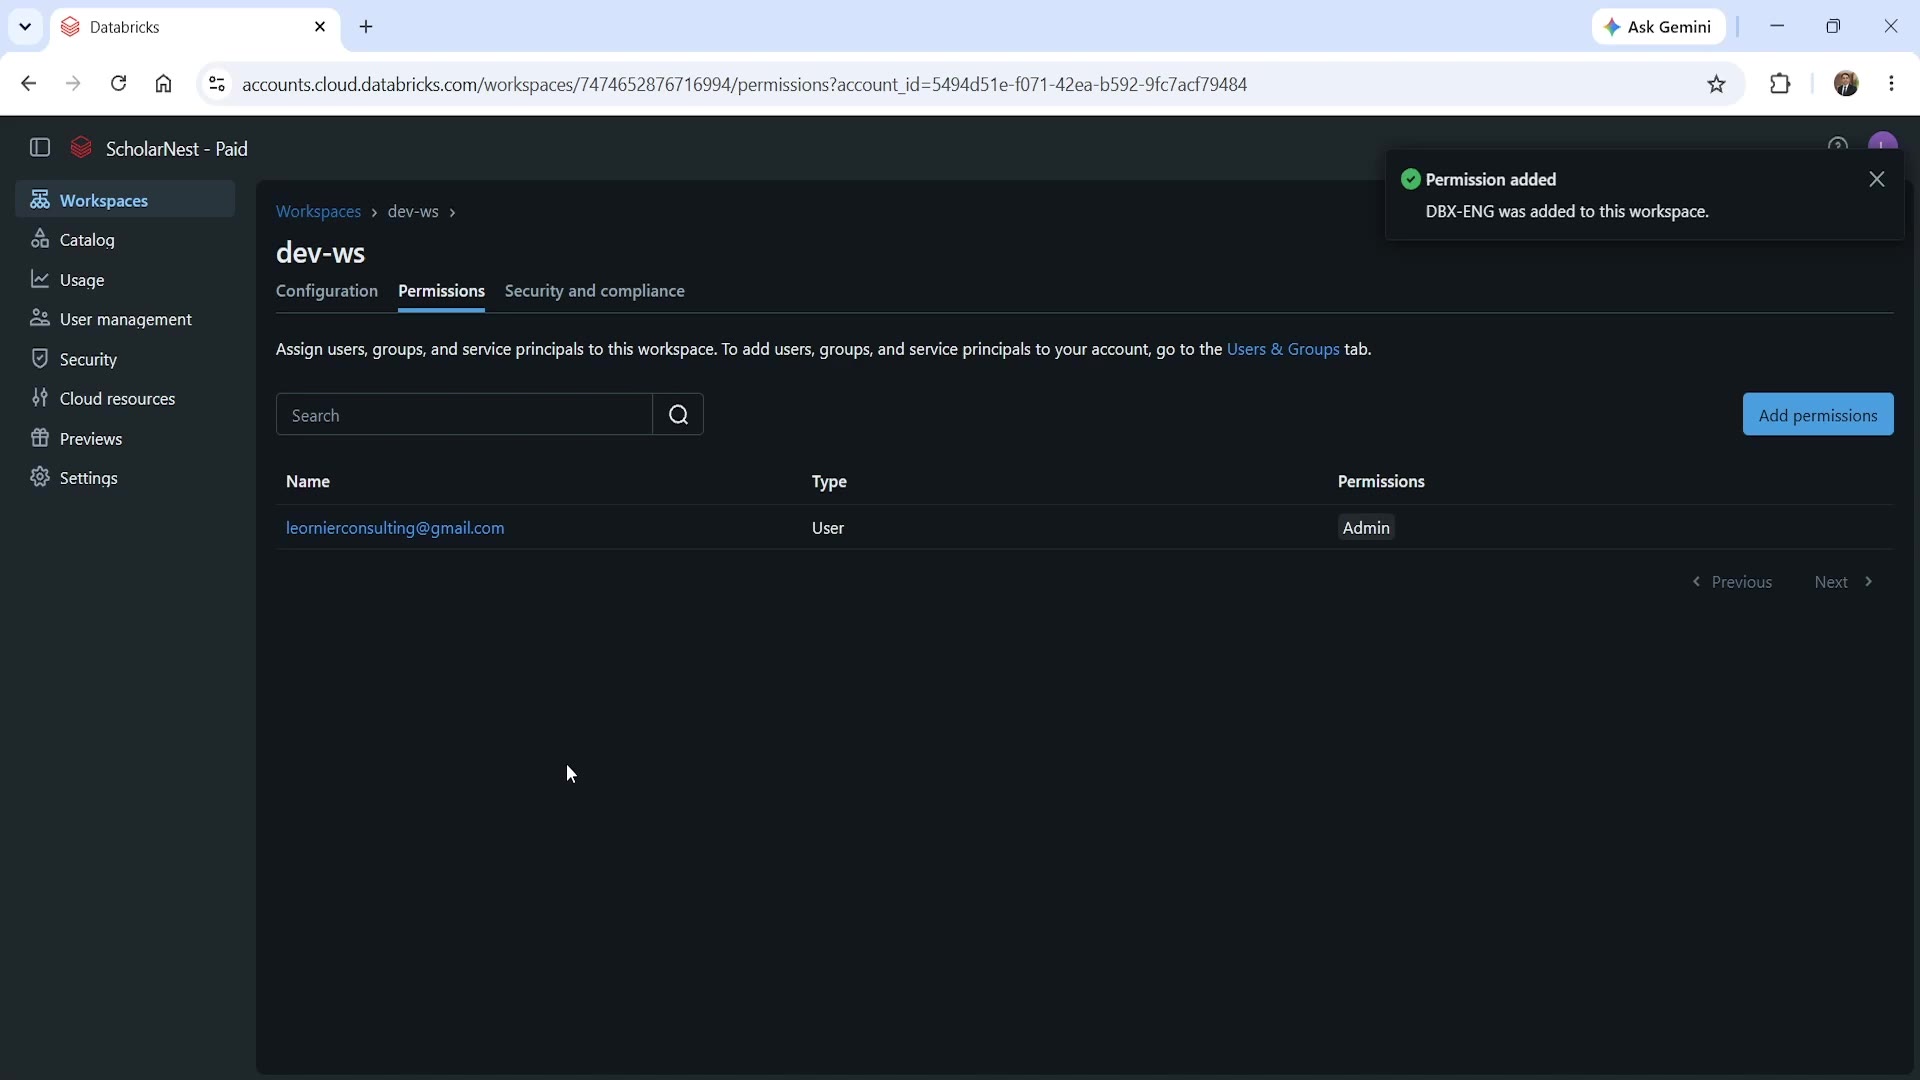 Workspace permissions — group added confirmation
For our setup:
- Add DBX-ENG and DBX-UAT to the Dev Workspace.
- Add DBX-PROD to the Prod Workspace.
Once added, you'll see a confirmation like "DBX-ENG was added to this workspace" — and the workspace's permission list now shows both the group and its access level.
Step 6: Assign a Workspace Admin
If you want a specific user to manage a workspace day-to-day (rather than relying only on the account admin), assign them the Admin permission directly on that workspace, from the same Permissions tab.
Step 7: Verify Access
The best way to confirm everything is wired correctly is to actually log in as one of the new users. Open an incognito/private browser window, and sign in as, say, dev1@.... You should land on the Databricks workspace home page for dev-ws — confirming that dev1's membership in DBX-ENG, and DBX-ENG's access to dev-ws, are both working correctly end to end.
Try the same for a prod1 user — they should be able to access prod-ws, but not dev-ws — confirming the isolation between environments is genuinely enforced, not just configured on paper.
What We Built
Putting this together with the previous two lectures, our environment now has:
- One metastore, shared across three workspaces.
- Two catalogs (
dev,prod), each with its own isolated storage. - Three groups (
DBX-ENG,DBX-UAT,DBX-PROD), each mapped to the appropriate workspace(s). - Five human users, organized into those groups rather than managed individually.
- One service principal, ready to authenticate an automated pipeline.
- Verified, working access boundaries between development/testing and production.
This is a complete, realistic Unity Catalog identity and access setup — the same overall pattern you'd use (at larger scale) in a real organization's Databricks environment.
Summary
| Step | What You Do |
|---|---|
| 1 | Create individual users (email-based identities) |
| 2 | Create groups to organize users by team/function |
| 3 | Add users as members of the appropriate groups |
| 4 | Create a service principal for automated/non-human workloads |
| 5 | Assign groups (or individual users) permissions on the relevant workspaces |
| 6 | Optionally assign a workspace admin |
| 7 | Verify access by logging in as a test user in an incognito window |
See you again. Keep learning, and keep growing!