Setup Your Kafka Environment
Before we touch a single line of Kafka code, we need a place to actually run Kafka. This lecture is about getting that environment up and running on your own machine.
We're going to run a real Kafka cluster on your own laptop, using Docker. Not one broker — three. That's how Kafka is actually used in the real world, and I want you comfortable with that from day one.
By the end of this lecture, you'll have a 3-broker Kafka cluster running on your machine, and Java, Maven, and IntelliJ IDEA ready for the hands-on chapters ahead. Look at the picture below — that's exactly what we're building.
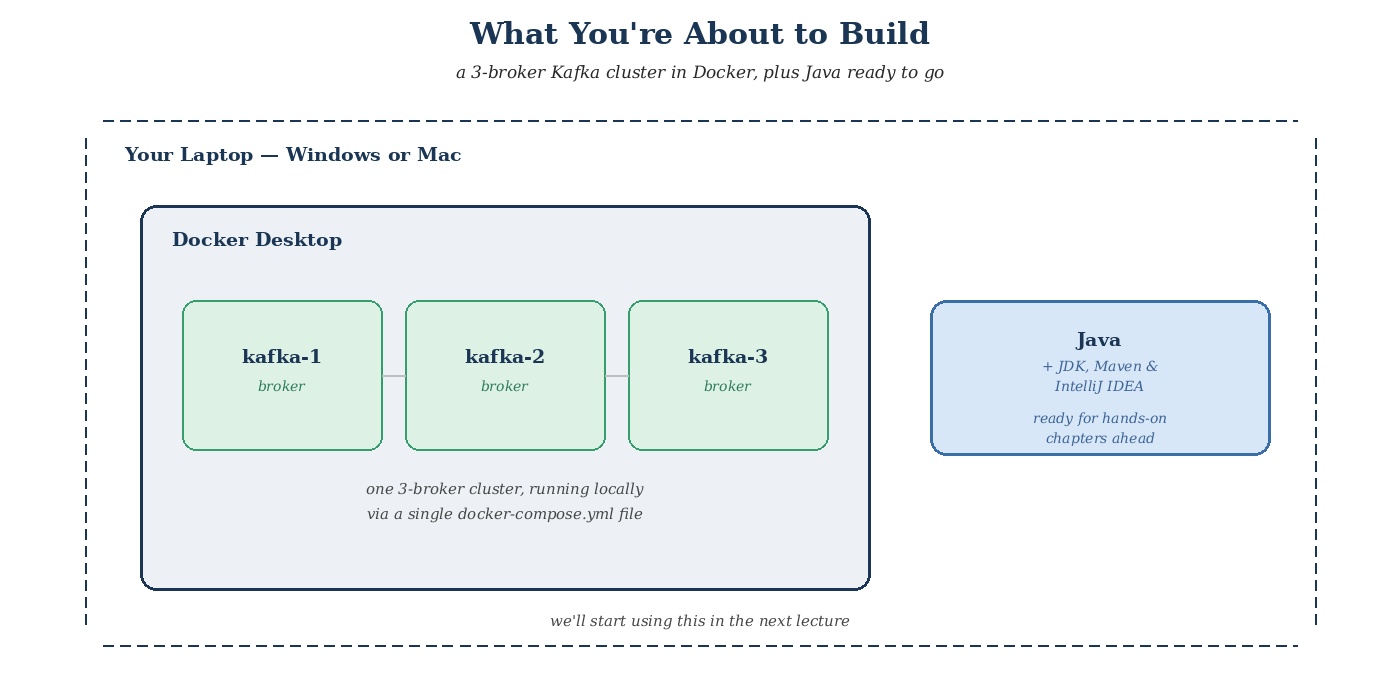 What you're about to build
We'll do a quick sanity check at the end to confirm everything actually works, and then clean up and switch it off. The full hands-on — creating topics, producing and consuming messages — is what the next lecture is all about. Today is purely about getting the environment built and proving it actually runs.
What You Need Before Starting
- A laptop or desktop with at least 8 GB RAM (16 GB is better)
- Windows or Mac — steps for both are given below
- A stable internet connection, just for a few one-time downloads
- About 30 to 40 minutes of uninterrupted time
That's it. You don't need any cloud account for this. Everything runs locally, on your own machine.
Setting Up WSL2 (Windows Users Only)
If you're on a Mac, skip this section entirely and move on to installing Docker.
Docker on Windows needs something called WSL2 to run properly. It's a small piece of Windows that lets Docker work smoothly underneath the hood. You won't need to open or work inside it directly at any point in this course — Docker uses it quietly in the background, and every command you type from here on runs from your normal PowerShell.
- Open PowerShell as Administrator. Right-click the Start button and choose "Terminal (Admin)", or search "PowerShell", right-click it, and choose "Run as administrator".
- Run this command:
powershellwsl --install
This one command turns on the Windows features WSL needs, installs WSL2 itself, and installs Ubuntu — a friendly, beginner-common flavor of Linux — as your default Linux system.
- Restart your computer when it asks you to. This step isn't optional.
- After restarting, check whether Ubuntu installed and opened on its own. If not, open PowerShell — regular this time, not admin — and run:
powershellwsl -l -v
- If you see
Ubuntuin the list, good — it installed correctly. Search "Ubuntu" in the Start menu and open it yourself. - If you see a message like "Windows Subsystem for Linux has no installed distributions," install it directly:
powershellwsl --install -d Ubuntu
- The first time Ubuntu opens as a real terminal window, it'll ask you to create a Linux username and a password. Keep it simple. When you type the password, nothing appears on screen — no dots, no stars. That's normal, not a glitch.
- Confirm you landed in the right place by running:
bashpwd
You should see /home/yourname. You won't be doing your Kafka work inside this Linux home folder — Docker Desktop handles the connection to Windows on its own — but this confirms WSL is set up correctly.
Double-Check WSL2 Is Really Working
Open PowerShell again — regular, not admin — and run:
powershellwsl --status
Look for Default Version: 2. If you instead see version 1, fix it with:
powershellwsl --set-default-version 2
Installing Docker Desktop
Docker lets us run Kafka in isolated containers, without installing Kafka directly onto your machine. This keeps things clean, and it also matches how Kafka is actually deployed in real companies.
For Windows Users
- Go to https://www.docker.com/products/docker-desktop
- Download Docker Desktop for Windows
- Run the installer, keeping all default options selected — this includes the WSL2 backend we just enabled
- Restart your machine if asked
- Open Docker Desktop from your Start menu and wait until it says "Docker is running"
For Mac Users
- Go to https://www.docker.com/products/docker-desktop
- Download Docker Desktop for Mac — choose the correct version for your chip; the download page detects Apple Silicon vs. Intel automatically
- Open the downloaded file and drag Docker into your Applications folder
- Open Docker from your Applications folder and wait until it says "Docker is running"
- No WSL setup is needed on Mac — this step alone is enough
Confirm Docker Installed Correctly
This part is identical on both Windows and Mac. Open your terminal — PowerShell on Windows, Terminal on Mac — and type:
bashdocker --version
You should see something like Docker version 24.x.x, or higher.
Installing Java
This course uses Java, with Kafka's official kafka-clients library, starting a bit further into our hands-on chapters. Let's set it up now so it's ready when you need it.
You'll need a JDK (Java Development Kit) — not just a JRE, since you'll be compiling code, not only running it. Any current LTS version works fine; if you're not sure which to pick, go with the newest LTS release available.
For Windows Users
- Go to https://adoptium.net/ and download the latest LTS build of Eclipse Temurin for Windows (this is a free, production-grade OpenJDK build — no Oracle account needed).
- Run the installer. On the setup screen, make sure "Set JAVA_HOME variable" and "Add to PATH" are both checked before installing. These boxes are easy to miss, and skipping them causes real problems later.
- Once installation finishes, close and reopen PowerShell — a fresh terminal is required to pick up the change.
- Confirm it worked:
powershelljava -version
You should see output naming the version you installed, something like openjdk version "21.0.x".
For Mac Users
- Go to https://adoptium.net/ and download the latest LTS build of Eclipse Temurin for macOS — choose the correct package for your chip (Apple Silicon or Intel).
- Run the installer, following the default prompts.
- Confirm it worked, in a new Terminal window:
bashjava -version
If you ever see a message about multiple Java versions being installed side by side, that's normal on Mac over time — just make sure java -version reports the LTS version you just installed. You can manage multiple versions later if you ever need to.
Installing a Build Tool: Maven
Real Java projects don't compile files by hand or manage dependencies manually — they use a build tool. This course uses Maven, since it's the most widely used build tool in the Kafka ecosystem and keeps our project setup simple and explicit.
Most Java installers, including Temurin, don't bundle Maven — it's a separate install.
Windows:
- Go to https://maven.apache.org/download.cgi and download the Binary zip archive.
- Extract it somewhere permanent, e.g.
C:\Program Files\Apache\maven. - Add its
binfolder to your PATH: search "Environment Variables" in the Start menu, edit thePathvariable under your user account, and add the full path to Maven'sbinfolder. - Open a fresh PowerShell window and confirm:
powershellmvn -version
Mac:
The simplest route on Mac is Homebrew, if you already have it installed:
bashbrew install maven
If you don't use Homebrew, download the same Binary zip archive from the Maven site above, extract it, and add its bin folder to your PATH in your shell profile (~/.zshrc or ~/.bash_profile).
Confirm it worked, either way:
bashmvn -version
You should see Maven's version, along with the Java version it found — confirming Maven and your JDK are correctly linked up.
Output / NoteNote: If your team or company already standardizes on Gradle instead of Maven, everything in this course transfers directly — you're just adding the same
kafka-clientsdependency through abuild.gradlefile instead of apom.xml. We use Maven here simply because its explicit, XML-based structure makes it easy to see exactly what's being added and why, which matters more when you're still learning.
Installing IntelliJ IDEA
This course uses IntelliJ IDEA as the IDE for writing and running our Java code. It's the most widely used IDE among professional Java developers, and it's built specifically for Java and the JVM — Maven and Gradle projects are recognized natively the moment you open them, with no extensions to install or configure.
As of a recent update, IntelliJ IDEA is a single, free product — there's no separate "Community" download to choose between anymore, and everything this course needs (Java support, Maven/Gradle integration, debugging) is included at no cost.
For Windows and Mac Users
- Go to https://www.jetbrains.com/idea/download/
- Download IntelliJ IDEA for your operating system
- Run the installer, keeping the default options selected
- Open IntelliJ IDEA once, just to confirm it launches — you don't need to create a project yet. We'll create our first real project together in the chapter where we write our producer and consumer code.
Output / NoteNote: If you're already comfortable in VS Code and prefer to keep using it, that's a perfectly reasonable choice — VS Code's Java support, via the Extension Pack for Java, works with the same JDK and Maven you just installed. Everything in this course is IDE-agnostic; we're simply using IntelliJ IDEA for its more native, out-of-the-box Java and Maven experience.
Creating Your Project Folder
Let's keep this course organized from day one.
- Create a new folder on your machine called
kafka-course - Inside it, create another folder called
setup
We'll keep adding to this same setup folder as the course goes on — later chapters will ask you to drop new files in here, alongside what you set up today.
Downloading the Cluster Setup File
To start our 3-broker cluster, we need one configuration file called docker-compose.yml. This file tells Docker exactly how to set up our three brokers, using the official Apache Kafka Docker image — the same image published directly by the Apache Kafka project itself.
- Download
docker-compose.ymlfrom this lecture's resources on the learning platform - Move the downloaded file into your
setupfolder
You don't need to open or understand this file right now — we'll go through it piece by piece in an upcoming lecture. For today, it's simply the file that brings your cluster to life.
Starting Your Kafka Cluster
Open your terminal, move into the setup folder, and run:
bashdocker compose up -d
The -d means "run in the background," so your terminal stays free.
The first time you run this, Docker will download the Kafka images. This can take a few minutes depending on your internet speed. That's completely normal — just let it finish.
Confirming Everything Actually Works
This is the sanity check for today — a quick way to prove your cluster is genuinely alive, not just that a command finished without error. We'll do the real, full hands-on with topics and messages in the next lecture.
First, confirm all three containers are up:
bashdocker ps
You should see three containers listed — kafka-1, kafka-2, and kafka-3 — each with a status of Up.
Now let's prove Kafka itself is actually responding, not just the containers. Open a terminal inside the kafka-1 container:
bashdocker exec -it kafka-1 bash
Your terminal prompt should change, showing you're now inside the container. Kafka's command-line tools live inside this container at /opt/kafka/bin/, but that folder isn't on the container's PATH by default. Fix that once, right after entering:
bashexport PATH=$PATH:/opt/kafka/bin
Now ask the broker to list its topics:
bashkafka-topics.sh --list --bootstrap-server kafka-1:29092
Notice we're using kafka-1:29092 as the address, not localhost:9092. That's because we're inside the kafka-1 container right now, and localhost inside a container only means "this container." To reach the whole cluster, we use the network name Docker gave each broker — kafka-1, kafka-2, kafka-3 — on port 29092. You'll use this same style of address any time you're working with Kafka's tools from inside a broker container, and the same address format from your Java code later, once you're connecting from outside the containers on localhost:9092 instead.
You'll see a short list of Kafka's own internal system topics — things like __consumer_offsets and __cluster_metadata, which exist automatically in every Kafka cluster. You haven't created anything of your own yet, and that's exactly the point: an empty-of-your-own-topics response here means the broker received your request and answered it correctly. Your cluster is genuinely alive.
Type exit to leave the container.
Cleaning Up
Since today's check didn't create anything of our own — no topics, no messages — there's nothing to remove. Cleanup today is simple: just switch the cluster off.
bashdocker compose stop
This switches your containers off and frees up your machine's resources, but keeps everything about your setup exactly as it is, ready to come straight back up next time.
docker compose stop is different from docker compose down. stop just pauses your containers. down removes them completely. Unless a future lecture specifically tells you to use down, always use stop.
The Routine You'll Use From Now On
bashdocker compose start # begin a session # ... do your hands-on work ... docker compose stop # end a session
Notice this is start, not up -d. You use up -d exactly once — the first time you create your containers, which you just did. From now on, start simply switches your existing containers back on, without recreating them or touching any data inside them.
Quick Recap
- We're running a real 3-broker Kafka cluster locally, using Docker — the same way Kafka runs in production, just on your own laptop.
- Docker Desktop, a JDK, Maven, and IntelliJ IDEA are now installed and ready for when we need them.
- Your cluster lives in a
setupfolder, started from a singledocker-compose.ymlfile you'll keep reusing. This folder is just for cluster configuration — no Java project here yet. docker compose up -dcreates your containers — you only ever need this once. After that, it'sstartandstop.- We confirmed the cluster is genuinely alive by listing topics from inside
kafka-1— not just that containers are running, but that Kafka itself is responding. - We'll create our actual Maven project — with the
kafka-clientsdependency, in IntelliJ IDEA — in the chapter where we write our first producer and consumer. - This setup is what you'll keep using through the next several chapters. The next lecture is where we actually start using it — creating topics, and sending and reading real messages.