Creating AWS Account
This course is about learning the Databricks platform and its capabilities for data engineering on AWS. So if you don't have access to AWS, you won't be able to fully repeat the hands-on activities in this course — a lot of it will make more sense once you have your own account to follow along with.
In this lecture, let's walk through how to create your own AWS account.
A quick note before we start: creating an AWS account is a multi-step process, and the exact steps can vary a bit by country — AWS also changes its signup UI from time to time. So the screens you see might look slightly different from what's shown here. That's fine — the flow should still be intuitive.
Let's go step by step.
Step 1: Start the Signup
Go to aws.amazon.com and click Create account. This takes you to the signup page.
Step 2: Email and Account Name
AWS will first ask for two things:
- A valid email address — this becomes your root user ID. The root user is the owner of the AWS account.
- An account name — you can use your personal name or a company name.
Fill these in and click Verify email address. AWS will send a verification code to your email — check your inbox, enter the code, and verify.
Step 3: Set a Root Password
Once your email is verified, you'll be asked to set a password for the root user. Enter a strong password and continue.
Step 4: Choose Your Account Plan
Next, AWS asks you to choose between a Free and a Paid (pay-as-you-go) plan.
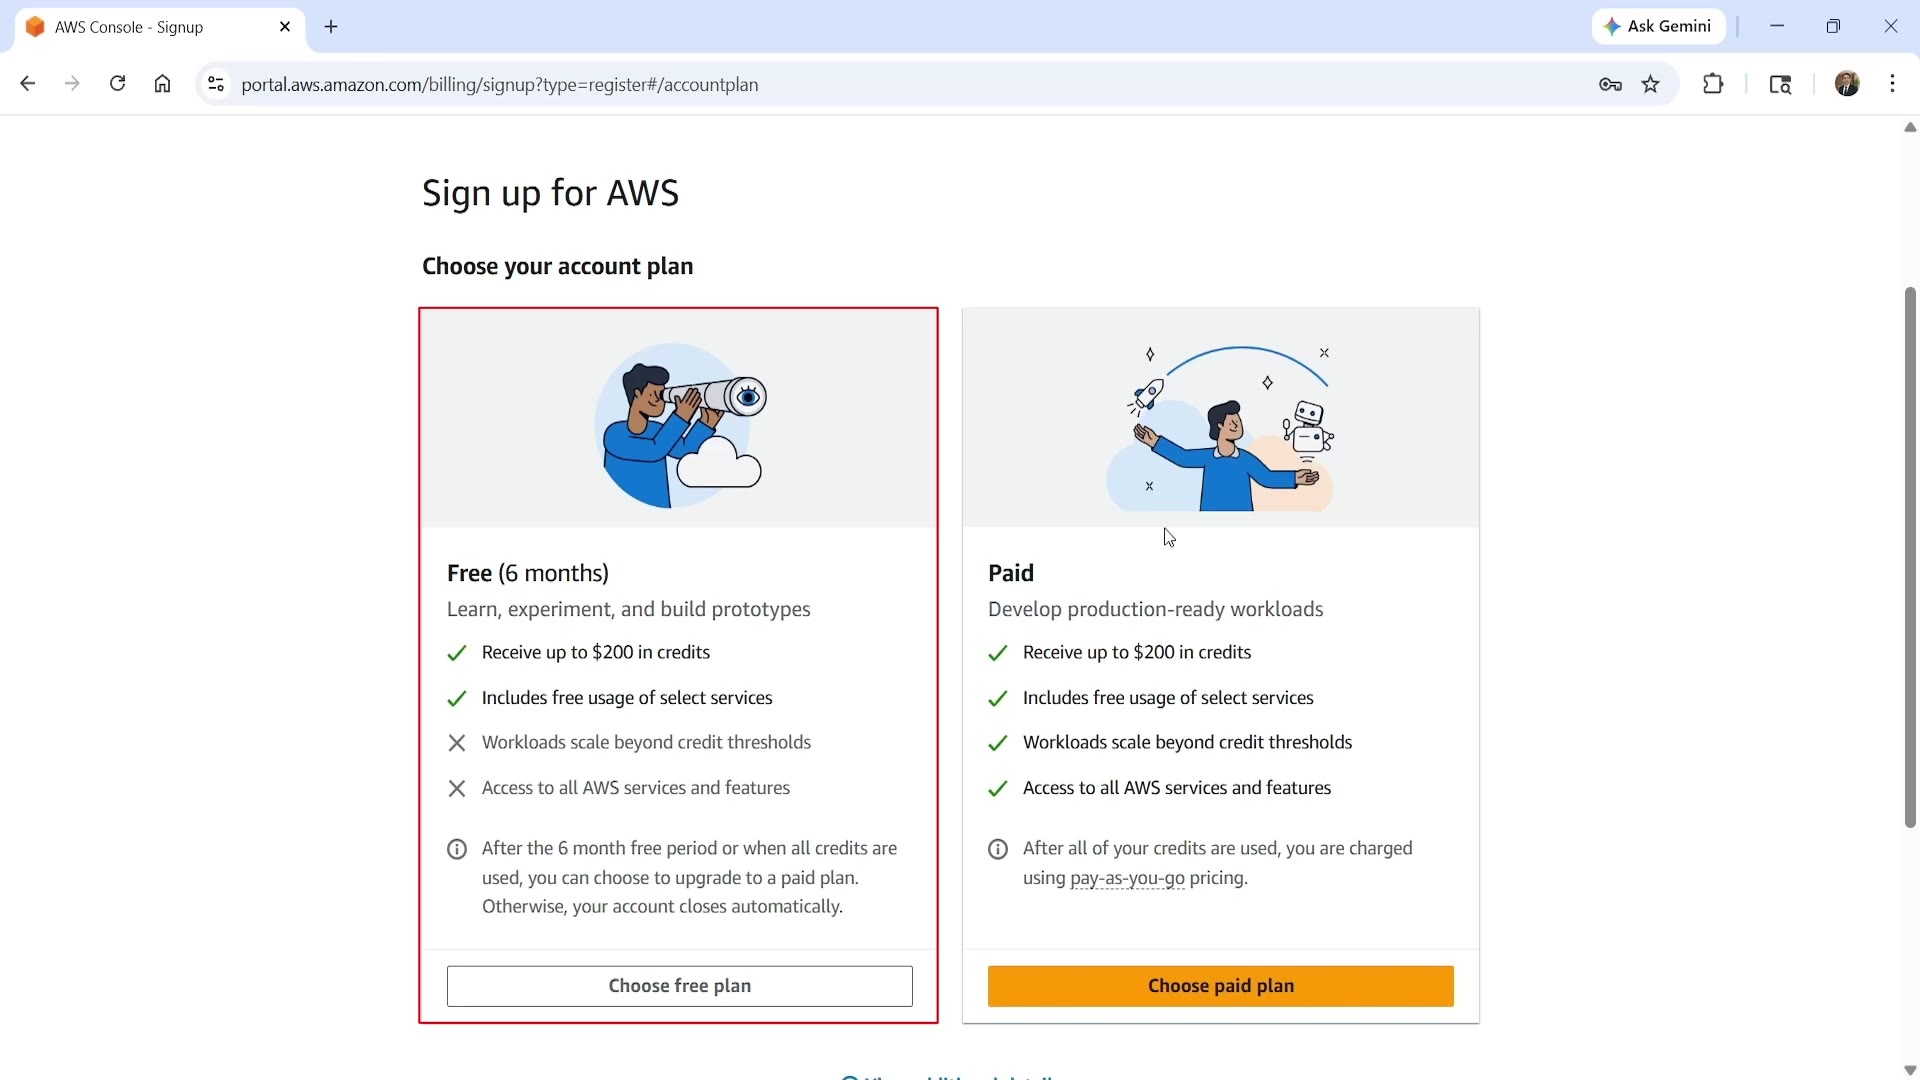 AWS account plan selection
- Free (6 months): Good for learning — you get up to $200 in credits, but workloads can't scale beyond credit thresholds, and you don't get access to all AWS services and features.
- Paid (pay-as-you-go): Also gives you up to $200 in credits, but with full access to all AWS services, and no scaling limitations.
For this course, we'll go with the Paid plan — it avoids the free plan's limitations, and we'll keep pointing out ways to minimize cost throughout the course as we go.
Step 5: Contact Information
Next, fill in your contact details — full name, phone number, country, address, city, state, postal code, etc. Agree to the customer agreement, and continue.
Step 6: Billing Information
Now you'll set up your billing method:
- If you're in India, you can set up a UPI auto-pay mandate (up to ₹15,000).
- Outside India, you'll typically set up a credit or debit card auto-pay mandate.
Once you approve the payment method, you'll see a verification success message and move to the next step.
Step 7: Identity Verification
You'll be asked the primary purpose of your account — choose Personal if this is for individual/learning use, with Individual as the ownership type.
Depending on your country, you may need to complete an identity verification step. For example, users in India can verify using Aadhaar (via DigiLocker — log in with your Aadhaar-linked phone number and OTP, then allow access), or alternatively a PAN card or other government ID. Aadhaar tends to be the simplest option.
After identity verification, you'll go through phone verification — AWS sends a code to your phone, which you enter to confirm.
Step 8: Choose a Support Plan
Finally, choose your support plan. For learning purposes, the free support plan is recommended.
Complete the signup, and AWS will take you to the AWS Management Console — you're officially inside AWS now.
After Signup: A Few Important Setup Steps
Set Your Region
At the top right of the console, you'll see your current AWS region.
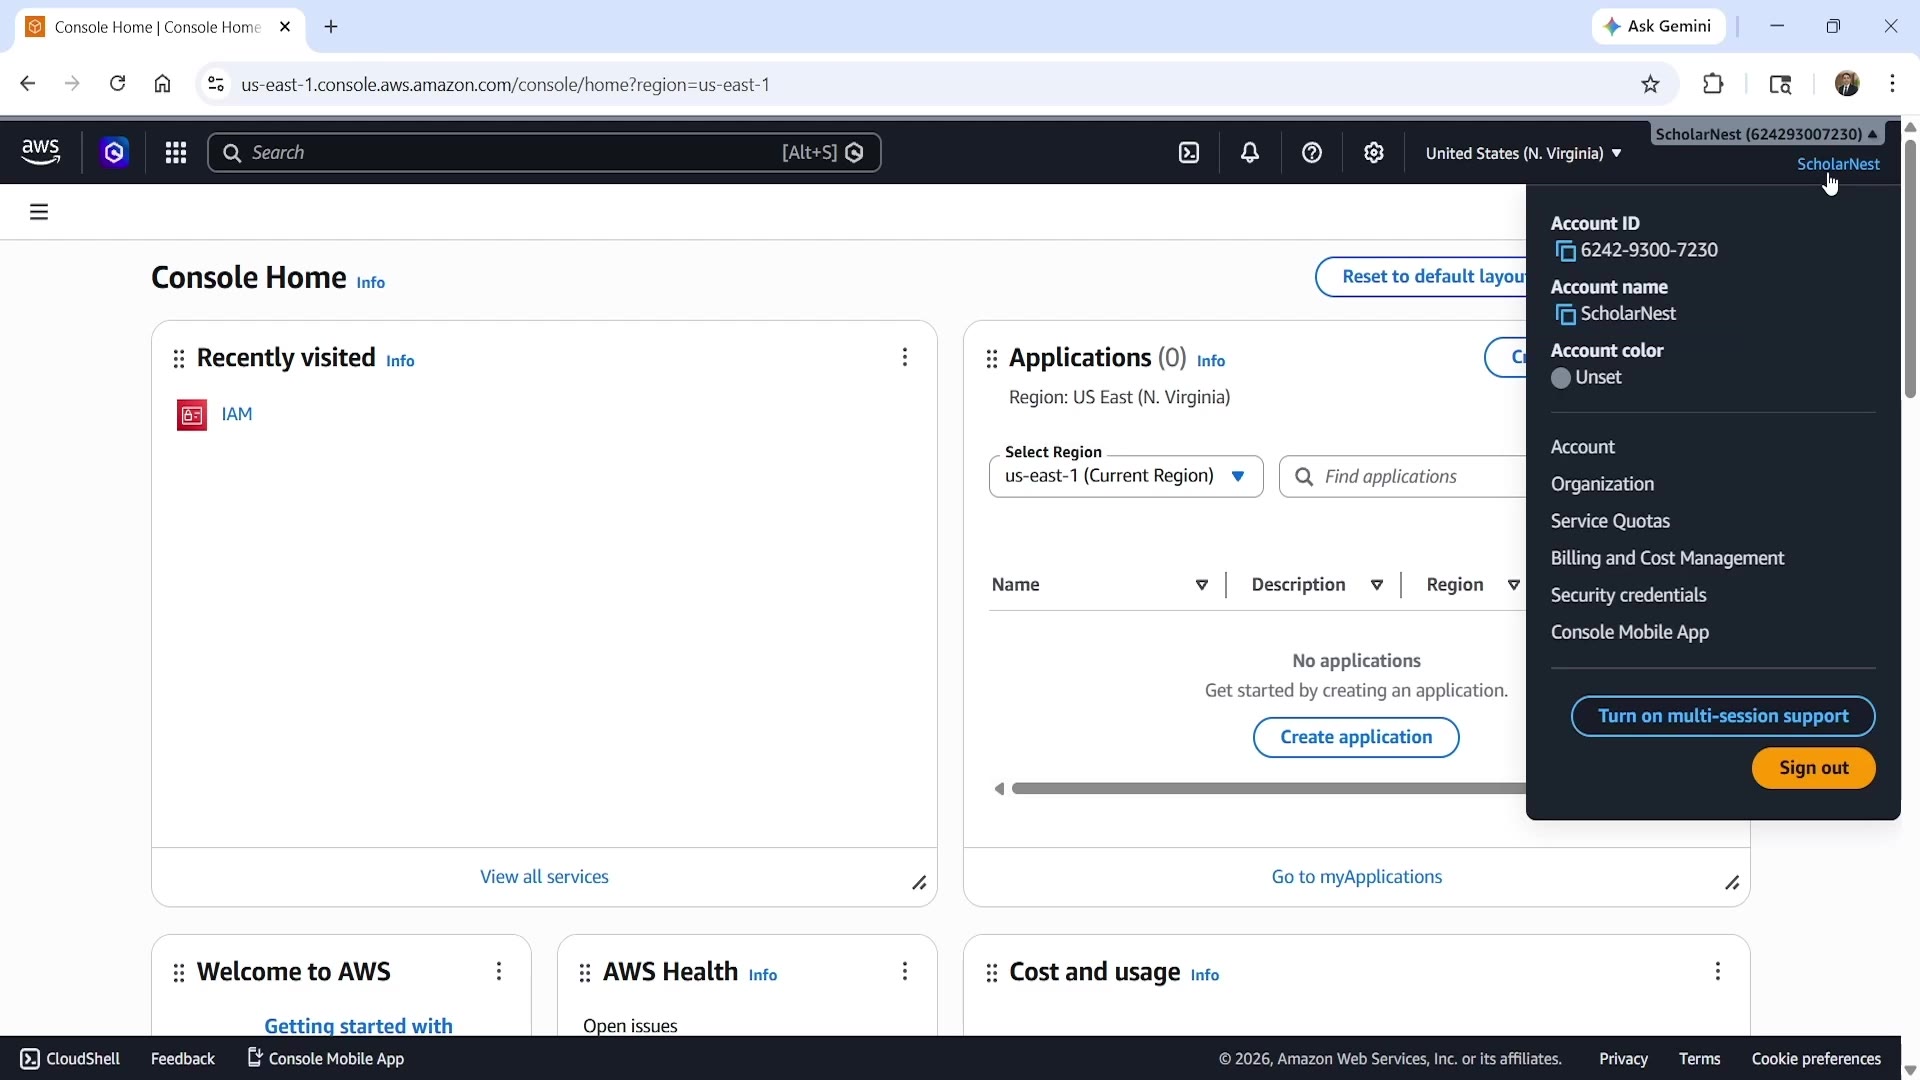 AWS Console — region selector and account menu
We recommend setting your region to North Virginia (us-east-1) or Ohio for this course. These regions are typically cheaper, and offer the widest range of AWS services — not every service is available in every region.
Secure Your Root User with MFA
At this point, you're logged in as the root user — the owner of the account. A word of caution here: never share your root user credentials with anyone. In fact, it's best practice to avoid using the root user for day-to-day work entirely — even AWS recommends this. Instead, you should tightly secure the root account, and create a separate IAM user for regular work. We'll create that IAM user in the next lecture.
To secure the root account, the first thing to do is enable Multi-Factor Authentication (MFA) — an extra layer of security on top of your password.
From the account menu (top right), go to Security credentials, and click Apply MFA device. Give your MFA device a name.
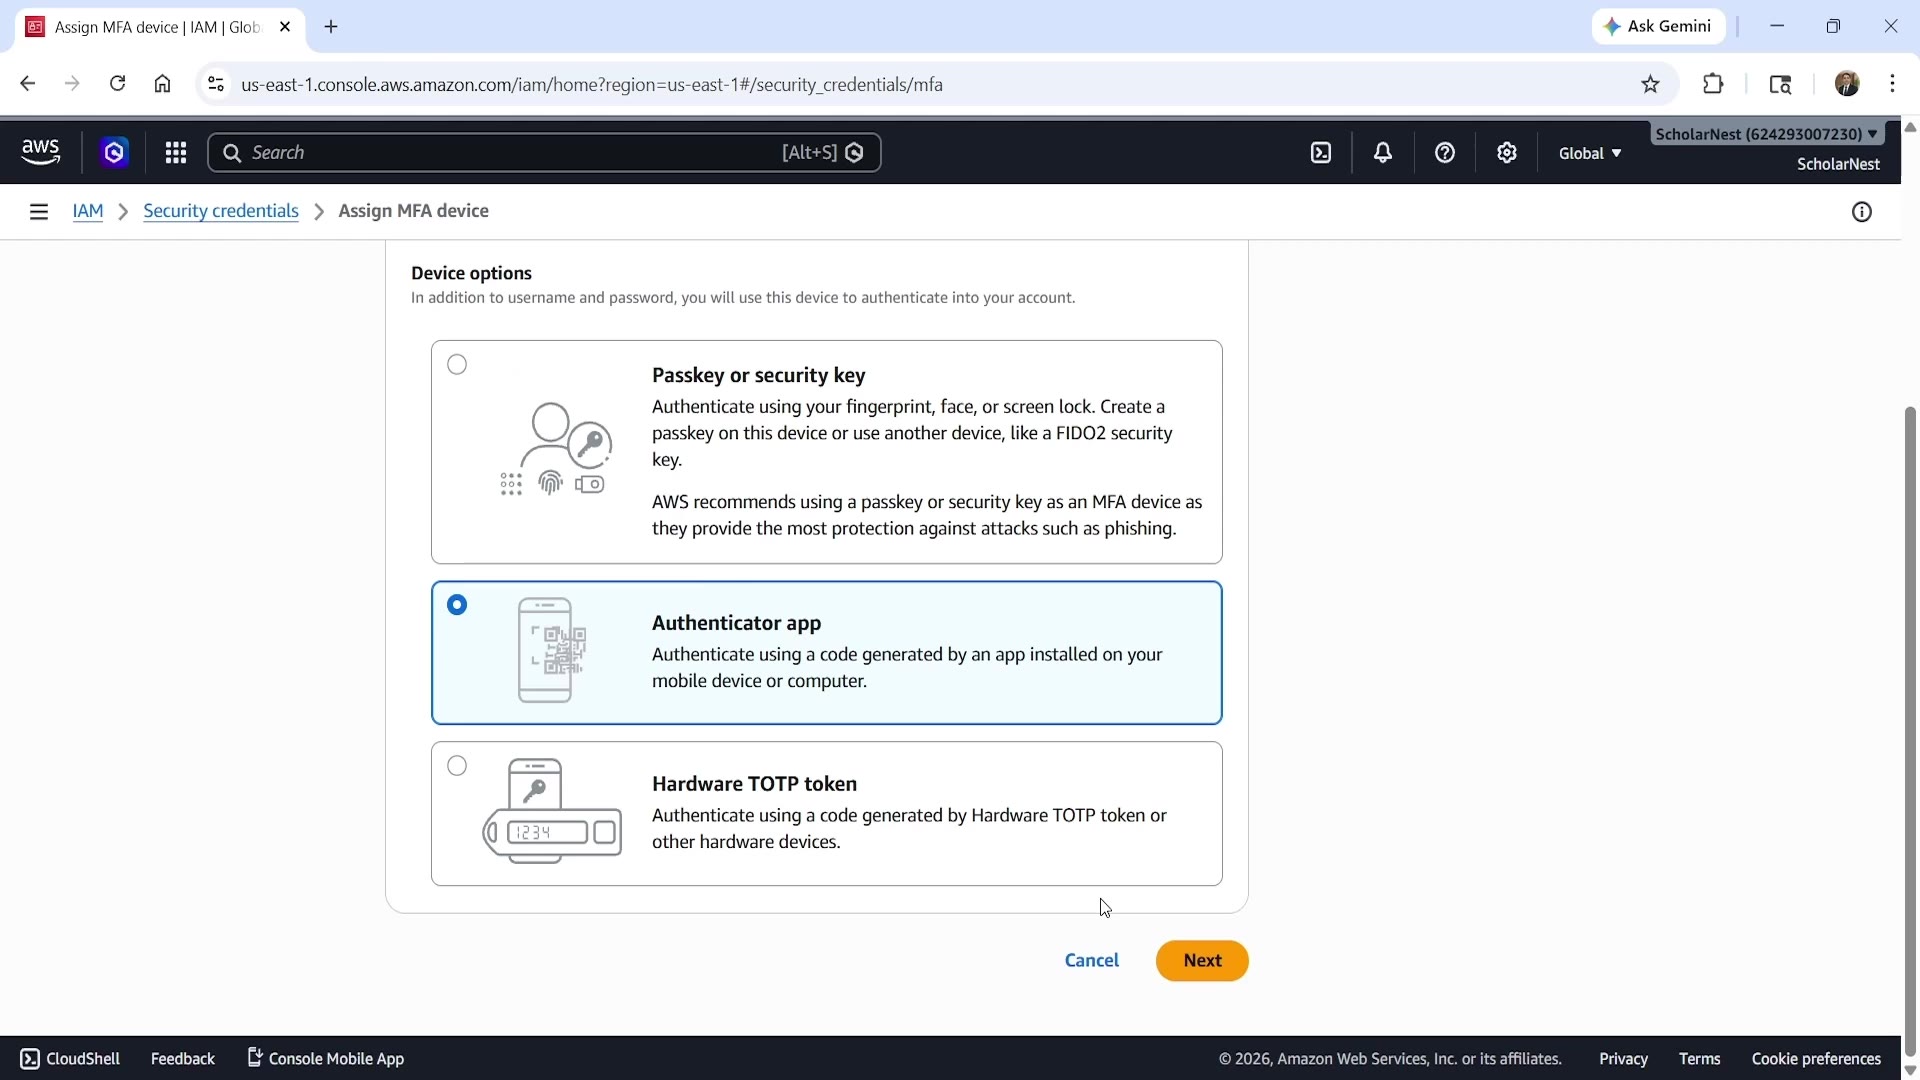 AWS MFA device options
You have a few options for the type of MFA device:
- Passkey or security key
- Authenticator app — uses a code generated by an app on your phone or computer
- Hardware TOTP token
We'll use the Authenticator app option, since it just needs a phone and a free app (like Microsoft Authenticator, Google Authenticator, or similar — AWS supports several).
Once you select this, AWS will show you a QR code. Scan it using your authenticator app to pair it with your AWS account. Your app will then show a 6-digit code — enter that as the first MFA code. Wait about 30 seconds for the app to generate a new code, and enter that as the second MFA code. Once both codes are accepted, click Add MFA — you should see a success message.
That's it — your root account is now secured with MFA.
Save Your Account Details
Go back to the console home, and click your account name at the top right. You'll see your Account ID and Account name — copy these down and keep them somewhere safe. You'll need them later in the course.
If you ever need to log out, you can do so from the same account menu.
Summary
| Step | What You Do |
|---|---|
| 1–3 | Sign up with email, verify it, set a root password |
| 4 | Choose Paid (pay-as-you-go) plan |
| 5–6 | Fill in contact info and billing details |
| 7 | Complete identity and phone verification |
| 8 | Choose the free support plan |
| After signup | Set your region (N. Virginia or Ohio), enable MFA on root, save your Account ID |
That's how you create and secure your AWS account. In the next video, we'll create an IAM user to use for your day-to-day AWS work going forward — as recommended by AWS, instead of using the root user directly.
See you again. Keep learning, and keep growing!