Creating AWS Databricks Serverless Workspace
In this lecture, let's set up your Databricks account and create your first serverless workspace on AWS.
Step 1: Set Up the Product
Go back to your AWS Marketplace subscription for Databricks Data Intelligence Platform (from the previous lecture), and click Set up product.
You may see a message like "Existing subscription detected" — that's expected, since we already created the subscription earlier. You can simply proceed.
You'll then see confirmation that your AWS Marketplace agreement was created, and the next step is to set up your account on the vendor's website (Databricks). Click Set up your account.
Step 2: Enable AWS Marketplace Deployment Integration
Before creating your Databricks account, AWS asks you to enable AWS Marketplace deployment integration. This is a required one-time setup step.
What this does: it allows AWS Marketplace to create a service-linked role, granting it permission to create and manage deployment resources for Databricks on your behalf — things like IAM roles and an S3 bucket needed for deployment. This is expected and safe — go ahead and enable it.
Step 3: Create Your Databricks Account
Next, click Create account. This opens the Databricks signup flow in a new tab.
- Use the same email address you used for your AWS account (recommended, for consistency).
- Verify your email with the code sent to you.
- Name your account — for example, your organization's name.
Important: Match Your AWS Region
Here's a detail that's easy to overlook, but matters: Databricks asks "Which region would you like to use?" — and this must match the region you're using in AWS. Since we decided earlier to use North Virginia (us-east-1) for all our AWS activity, we select the same here.
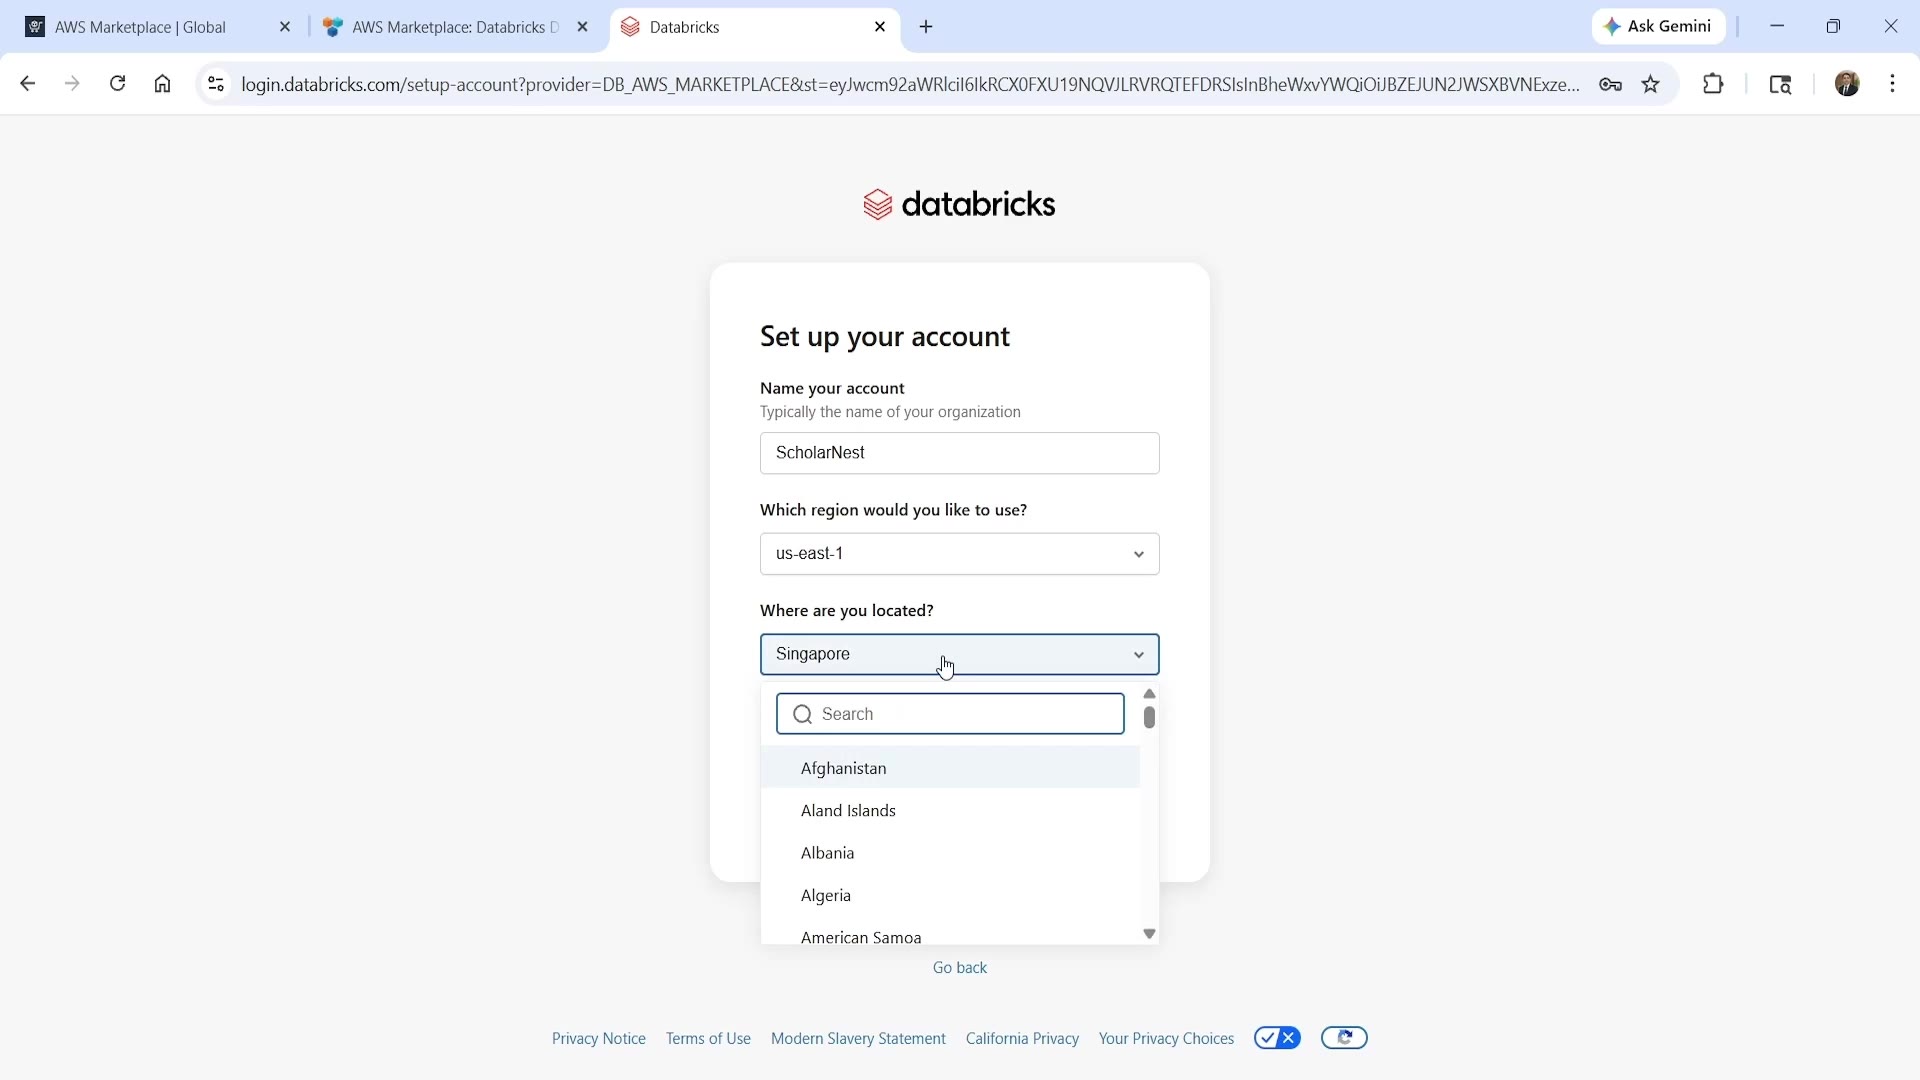 Databricks account setup — matching your AWS region
If your Databricks region doesn't match your AWS region, you can run into friction later when connecting Databricks to your AWS resources — so it's worth getting this right at setup time.
You'll also be asked where you're located (your country) — just answer normally. Complete the short verification puzzle if prompted, and continue.
Step 4: Account Linked, Workspace Created
Once this is done, you'll see: "Your AWS subscription was successfully linked." Click Continue to Databricks.
At this point, two things have happened automatically:
- Your Databricks account has been created.
- A serverless workspace has been created for you — this is your first workspace, created automatically as part of account setup.
You'll notice it's running on credits — this workspace uses your 14-day trial credits. After the trial period, it converts to pay-as-you-go, and you'll be billed for actual usage.
Good to know: a serverless workspace itself has no cost just for existing. You're only charged when you actually run something — code, a pipeline, a query — that uses serverless compute. So you can safely keep this workspace around for as long as you're learning from this course, and delete it whenever you're done. For the first 14 days, you pay nothing at all (it's covered by trial credits); after that, you're billed only for what you actually run.
Step 5: The Databricks Account Management Console
There's an important second console you should know about, separate from your workspace. From within your workspace, click the workspace name, and you'll find a link to Manage account — this takes you to the Databricks Account Management Console.
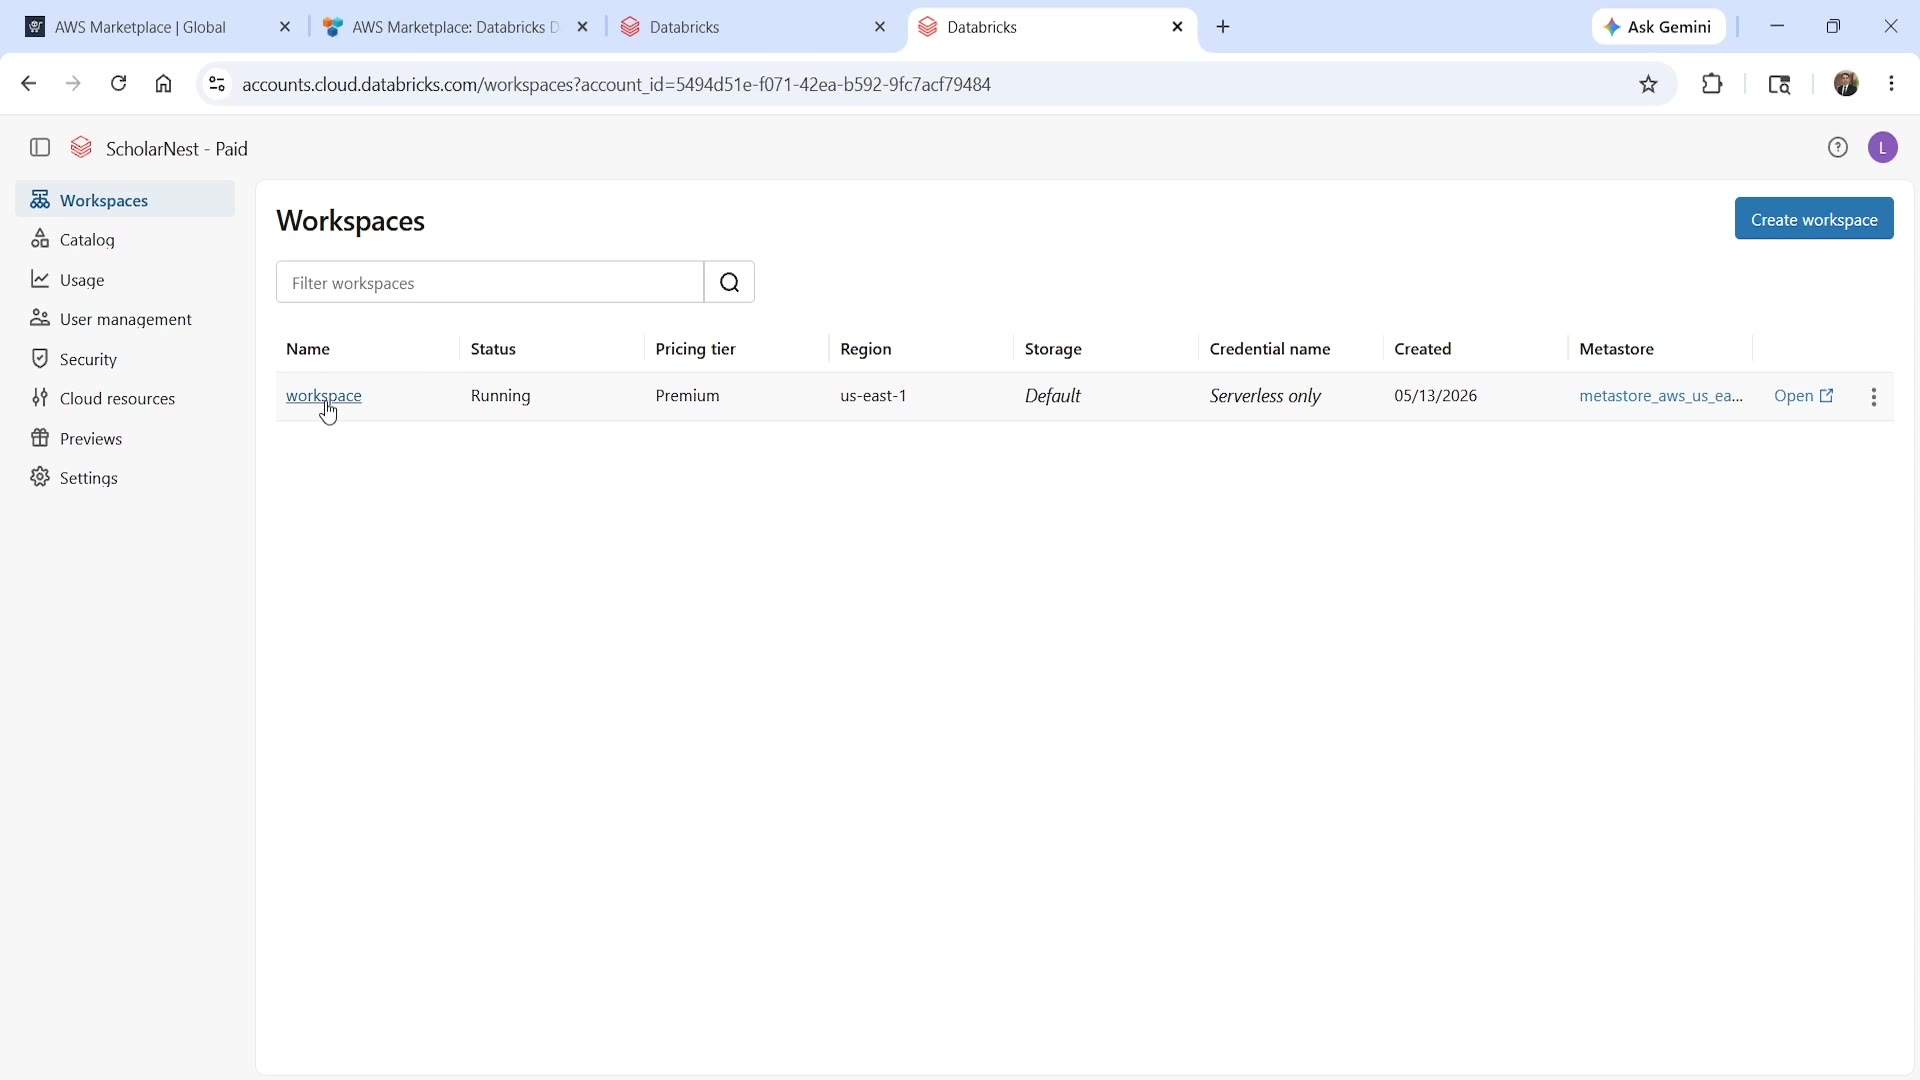 Databricks Account Management Console
This console lets you manage things at the account level (as opposed to inside a single workspace):
- Workspaces — a list of all workspaces under your account (right now, just the one).
- Catalog — Unity Catalog metastore management.
- Usage — usage and billing details.
- User management — manage users across your account.
- Security, Cloud resources, Previews, and Settings — additional account-level configuration.
You'll come back to this console many times throughout the course, so it's worth knowing it exists and how to get to it.
Renaming Your Workspace
While you're here, you can also rename your workspace. By default, it's just called "workspace" — not very descriptive. Click into it, and rename it to something clearer, like "serverless" (to distinguish it later from a classic workspace, which we'll create in an upcoming lecture). After renaming, go back to the workspace list — you may need to refresh the page to see the updated name.
Step 6: A Quick Look at Workspace Settings
Back in your workspace, click your account icon (top right) and go to Settings. This takes you to the workspace settings page.
A quick note: this area is primarily meant for workspace admins. Since you created this account and workspace yourself, you have full admin access — but in a team setting, regular users typically wouldn't see all of this; only admins would.
One setting worth customizing right away: under User → Preferences → Appearance, you can set your interface theme to Light, Dark, or System default — whichever you prefer.
Step 7: Don't Accidentally Create a Second Workspace
One important thing to watch out for: if you go back to the AWS Marketplace tab where you originally clicked "Set up your account," you may still see a Next button waiting. Don't click it — doing so will create a second workspace, and this time a classic workspace (which, unlike serverless, does carry an ongoing cost). Since we don't need that right now, simply Cancel or Leave that flow instead.
You can always confirm your subscription is still intact by checking Manage Subscriptions in AWS Marketplace — your Databricks subscription will still be listed there.
Summary
| Step | What You Do |
|---|---|
| 1 | Click "Set up product" on your AWS Marketplace subscription |
| 2 | Enable AWS Marketplace deployment integration |
| 3 | Create your Databricks account — match your AWS region (e.g., us-east-1) |
| 4 | Account and serverless workspace are created automatically |
| 5 | Explore the Account Management Console; rename your workspace |
| 6 | Customize workspace settings (e.g., dark theme) |
| 7 | Avoid clicking "Next" in the leftover AWS Marketplace tab — it creates a costly classic workspace |
That's it — you now have a working Databricks account with a serverless workspace on AWS, ready for hands-on learning.
See you again. Keep learning, and keep growing!