Introduction to Databricks Notebooks
In this lecture, we'll cover four things:
- What is a Databricks notebook?
- How to navigate the notebook environment
- Its most important features
- How to write and run Spark code inside a notebook
Let's get started.
What Is a Databricks Notebook?
Think of a Databricks notebook as an interactive document that combines live code, outputs, and rich text, all in one place. If you've used a Jupyter notebook before, the concept will feel familiar. The key difference: Databricks notebooks are deeply integrated with Apache Spark, cloud storage, and the Databricks platform, which makes them far more powerful for large-scale data engineering work.
Creating Your First Notebook
Go to your workspace explorer — you'll see a folder-like structure here, meaning you can organize your notebooks into folders, just like a file system.
Go to Home (your personal home directory in the workspace). Right-click and create a folder — let's call it exercises. Inside that folder, create a notebook.
- The notebook name appears at the top — click it to rename. Let's call ours
01-Intro-to-Notebooks. - Below the name is the toolbar — this holds most of the notebook's functionality, and we'll explore more of it as the course progresses.
- Every notebook has a default language (Python, SQL, Scala, or R are all supported in general). On the Databricks Free Edition, which runs on a free serverless cluster, notebooks support Python and SQL only — which is more than enough, since most of the data engineering work in this course uses exactly those two.
Attaching a Cluster
To run any code, your notebook needs a cluster attached to it. Use the cluster selector in the toolbar to choose one.
- On the Free Edition, only the serverless cluster is available.
- On a Premium account, you may have more choices — a serverless cluster, or a dedicated cluster, depending on what your project needs.
Attach the serverless cluster — a green indicator confirms it's connected. Once attached, any code you run in this notebook executes on that cluster, in a distributed manner.
Working With Cells
The center of the notebook is made up of cells — the actual area where you write and run code.
- A notebook starts with one default cell. Click into it to start writing.
- You can write single or multiple lines of code in a cell — there's no requirement to put everything in one cell.
- To add more cells, hover your mouse near the top or bottom of an existing cell — you'll see + Code and + Text options appear. You can add cells below an existing one, or above it, depending on where you hover.
- To delete a cell, use the cell's menu (the "..." or similar icon) and choose delete.
- To reorder cells, click and hold the drag handle on a cell, and move it up or down.
Running Cells
- Click the Run (▶) button on a cell, or
- Press Shift + Enter — runs the current cell and moves focus to the next one, or
- Press Ctrl + Enter — runs the current cell but keeps focus on the same cell.
- To run everything in the notebook, use Run All from the toolbar menu.
Writing and Running Code
Let's try a simple Python example:
python# My first Databricks cell print("Hello from Databricks!")
Run it with Ctrl+Enter or the Run button — the output appears directly below the cell. Every cell shows its output right underneath it.
Now let's try some actual Spark code. (This course assumes you already know Apache Spark — we're focused on the Databricks platform, not teaching Spark itself.)
pythoncsv_path = '/databricks-datasets/Rdatasets/data-001/csv/ggplot2/diamonds.csv' diamonds_df = (spark.read .option('header', 'true') # first row is the column header .option('inferSchema', 'true') # auto-detect column data types .csv(csv_path) ) result_df = (diamonds_df .select('cut', 'color', 'clarity', 'price', 'carat') .filter((diamonds_df['cut'] == 'Premium') & (diamonds_df['price'] > 5000)) ) display(result_df)
A couple of things to notice:
- The path points to
diamonds.csv, part of the Databricks sample datasets — these come pre-loaded in every Databricks environment, so this file should already be available to you too. - Notice we never created a
SparkSession— Databricks notebooks give you a ready-to-use Spark session automatically, available as thesparkvariable. Just start using it directly.
Run the cell, and you'll see the resulting DataFrame displayed right below it.
Version History
Notebooks in Databricks automatically capture versions as you work. Every time you execute code, a new version is saved, along with a timestamp.
To view this, open the Version History panel from the right-side toolbar icon:
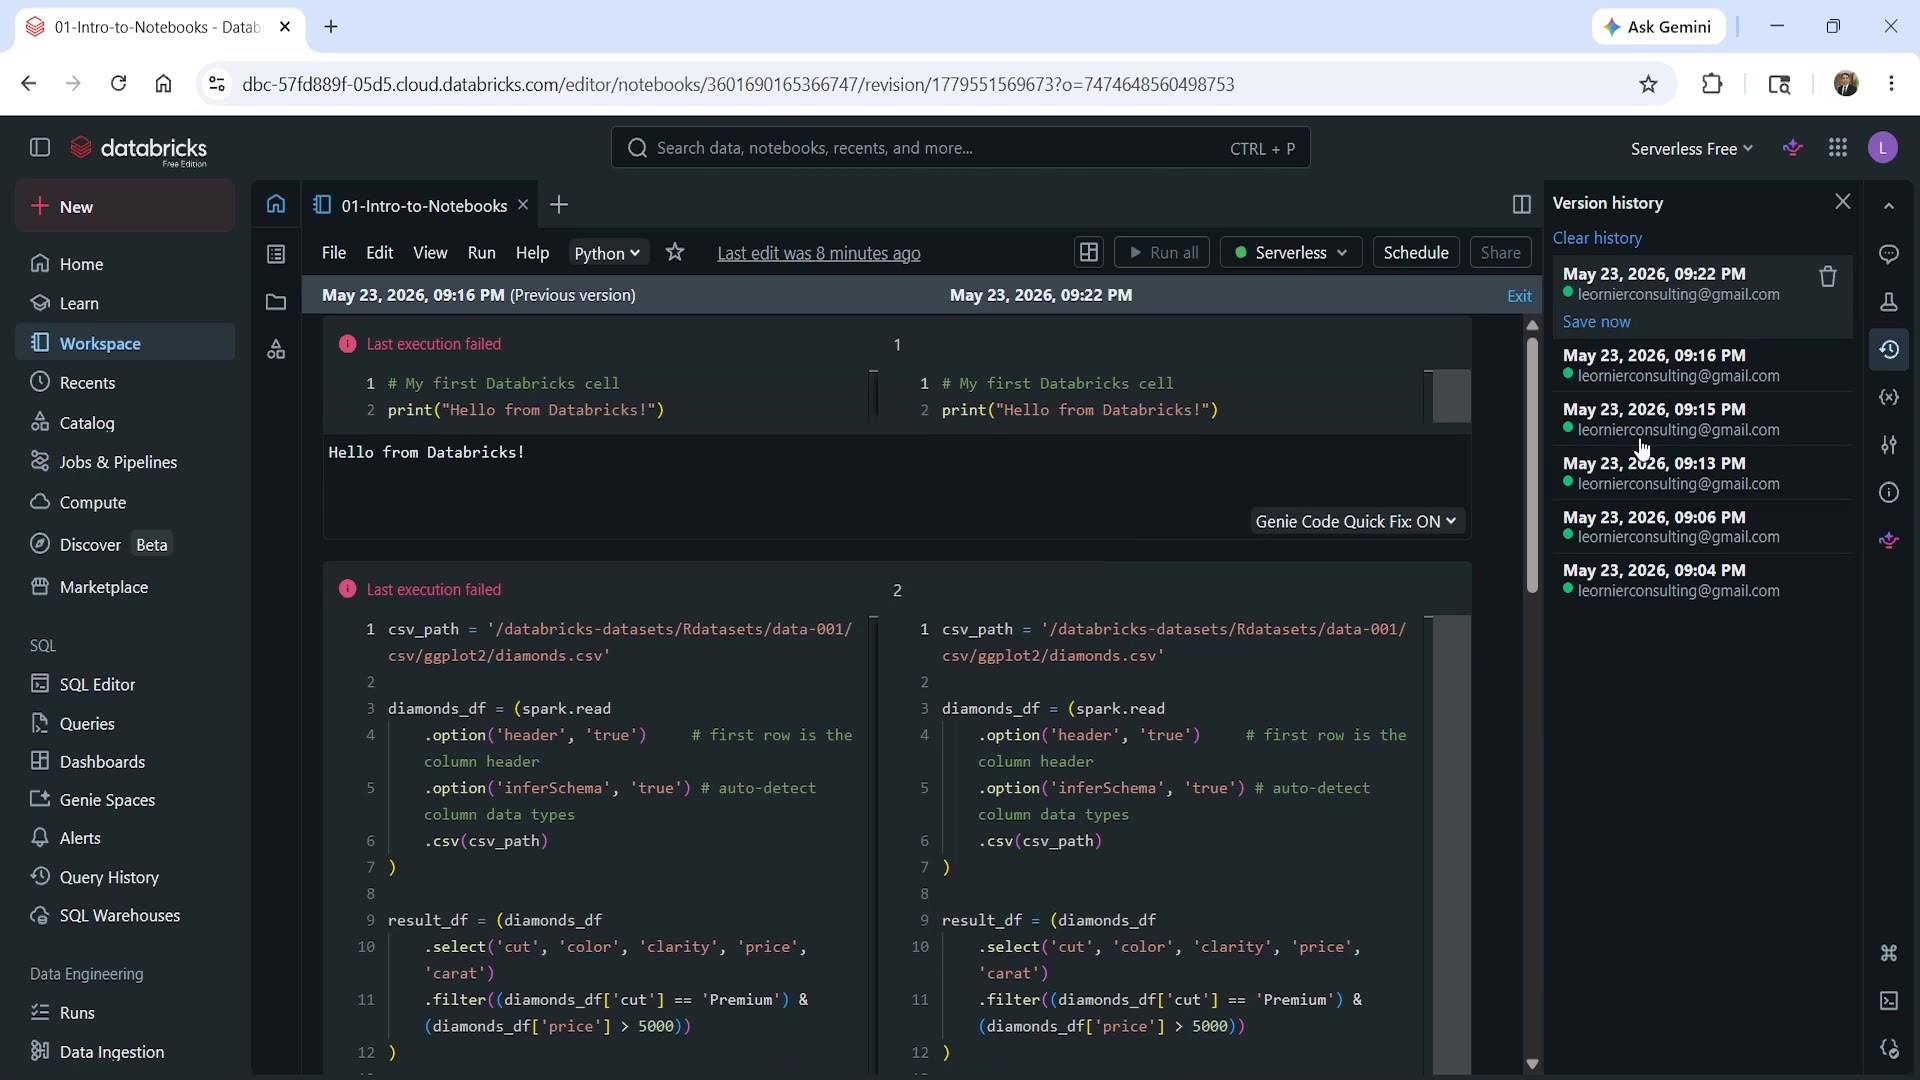 Notebook version history panel
This gives you a side-by-side diff view — comparing an older version of your notebook against the current one, with changes clearly highlighted. You can:
- Browse through previous versions.
- Jump back to an older version if needed.
- Delete versions you no longer want.
This is essentially built-in version control for your notebook, without needing any external tooling.
Exporting and Importing Notebooks
If you want to take a notebook out of the cloud environment — say, to save it locally, or check it into GitHub/source control — use the File → Export menu.
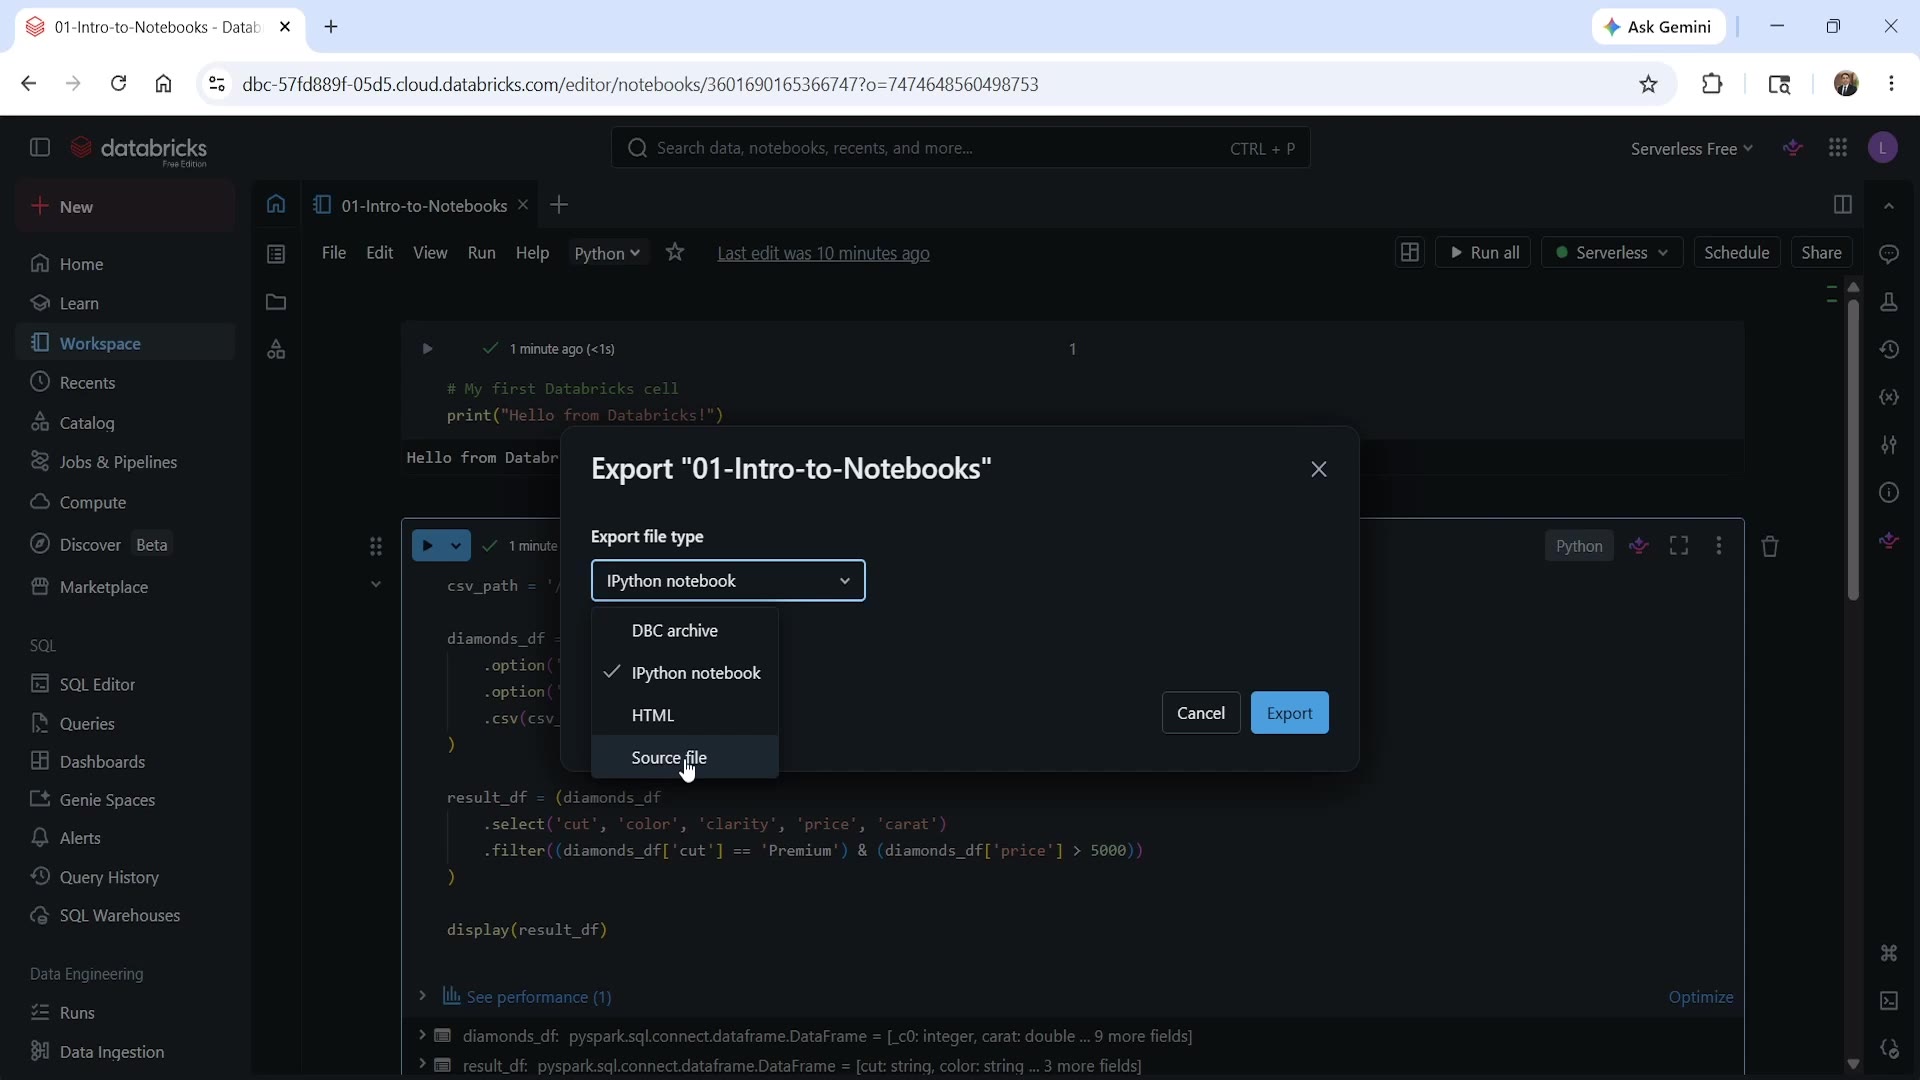 Notebook export options
You have four export format options:
- IPython notebook (the default, and generally the best option) — a standard
.ipynbfile. - Source file — exports just the code as a plain
.pyfile. - HTML — useful mainly if you want to share a readable version with someone, outside of Databricks.
- DBC archive — Databricks' own native compressed format. It won't work outside Databricks, but it has one special advantage: you can export an entire folder of notebooks as a single
.dbcarchive file, all at once.
When exporting, you'll also be asked whether to include outputs — choose based on whether you want the exported file to retain the results you've already run.
Importing works the same way in reverse — use the Import option, and either drag-and-drop your .ipynb or .dbc file, or browse to select it. Once imported, the notebook is loaded straight into your Databricks workspace.
Summary
| Feature | What It Does |
|---|---|
| Cells | Write and run code in small, independent blocks |
| Shift+Enter / Ctrl+Enter | Run a cell (and move on / stay in place) |
| Attached cluster | Required to execute any code — serverless or dedicated |
spark variable | Pre-created Spark session, ready to use |
| Version History | Automatic versioning with side-by-side diffs |
| Export | IPython notebook, Source file, HTML, or DBC archive |
| Import | Load .ipynb or .dbc files back into your workspace |
That covers the basics of the Databricks notebook. We'll be using notebooks constantly throughout this course, and you'll pick up more features naturally as we go — but this is more than enough to get started.
See you again. Keep learning, and keep growing!