Managing Your AWS Cost
Throughout this course, we'll be creating a lot of services in AWS for hands-on practice — and everything has a cost attached to it. So it's important to know how to check your billing information, understand how much you've spent, see your cost forecast, and set up a budget with alerts so you know if you're approaching (or crossing) your spending limit.
In this lecture, let's cover exactly that: checking your bills, and setting up a budget and alert.
A Quick Note on Root vs. IAM Access
Go to console.aws.amazon.com. By default, billing and budget information is only accessible through the root user — these permissions aren't given to an IAM user automatically (though you can configure an IAM user to have them, if you choose). For this lecture, we'll sign in as root, using our email, password, and MFA code.
Step 1: Check Your Billing and Cost Management Home
Once signed in, search for "Billing and Cost Management" (or find it in your recently visited services), and open it.
This page shows you:
- Month-to-date cost
- Total forecasted cost for the current month
- Last month's cost for the same time period
- Last month's total cost
If you've just created your account and haven't used any services yet, all of this will show as unavailable or zero — that's completely normal. This is simply the place you'll come back to whenever you want a quick pulse-check on your spending.
You'll also find:
- Bills — your AWS bill summary, account ID, and charges broken down by account.
- Payments — where you can make payments if you have a balance due.
- Credits — shows any credits on your account.
Step 2: Check Your Free Tier Credits
A new AWS account typically comes with free tier access plus $100 in credit, usable within 6 months. You can check the amount remaining, amount used, and the expiration date under Credits. Keep this in mind — it directly affects when your spending starts actually costing you money (more on that below).
Step 3: Set Up a Budget and Alert
This is the important part — setting up a safety net so you're notified if your spending starts crossing a threshold.
Good to know first: there's no additional charge for using AWS Budgets itself. You only pay if you configure budget actions that go beyond the free tier allowance (62 action-enabled budget days). Since we're only setting up a budget and an alert — no automated actions — this entire setup is completely free.
Navigate to Budgets and Planning → Budgets, and click Create a budget.
You'll see a few options: pre-built templates (like "Zero spend budget," which triggers as soon as you spend anything beyond your free tier/credits) or a customized budget. We'll go with a custom budget, specifically a Cost budget — since we want to track spending and get alerted based on it.
Configure the Budget
Give your budget a name (e.g., "Databricks Course AWS Budget"), and set:
- Period: You can choose monthly, quarterly, annually, or daily. We'll use Annually.
- Budget renewal type: Recurring (so it renews automatically each year) or Expiring (stops after a set year). We'll go with Recurring, so we don't need to recreate it next year.
- Budgeting method: Fixed — a single budgeted amount to track against.
- Budgeted amount: Here's the important calculation. We already have $100 in free credit. Let's add $20 more on top, so our total is $120 — meaning we want to be alerted if we spend anything beyond $120 total. Since we're tracking the additional $20 (beyond the $100 credit), we'll actually enter $20 as the budget amount, using the aggregation setting below to make this work correctly.
Understand Cost Aggregation: Net Unblended vs. Unblended
This next setting matters, and it's easy to get wrong:
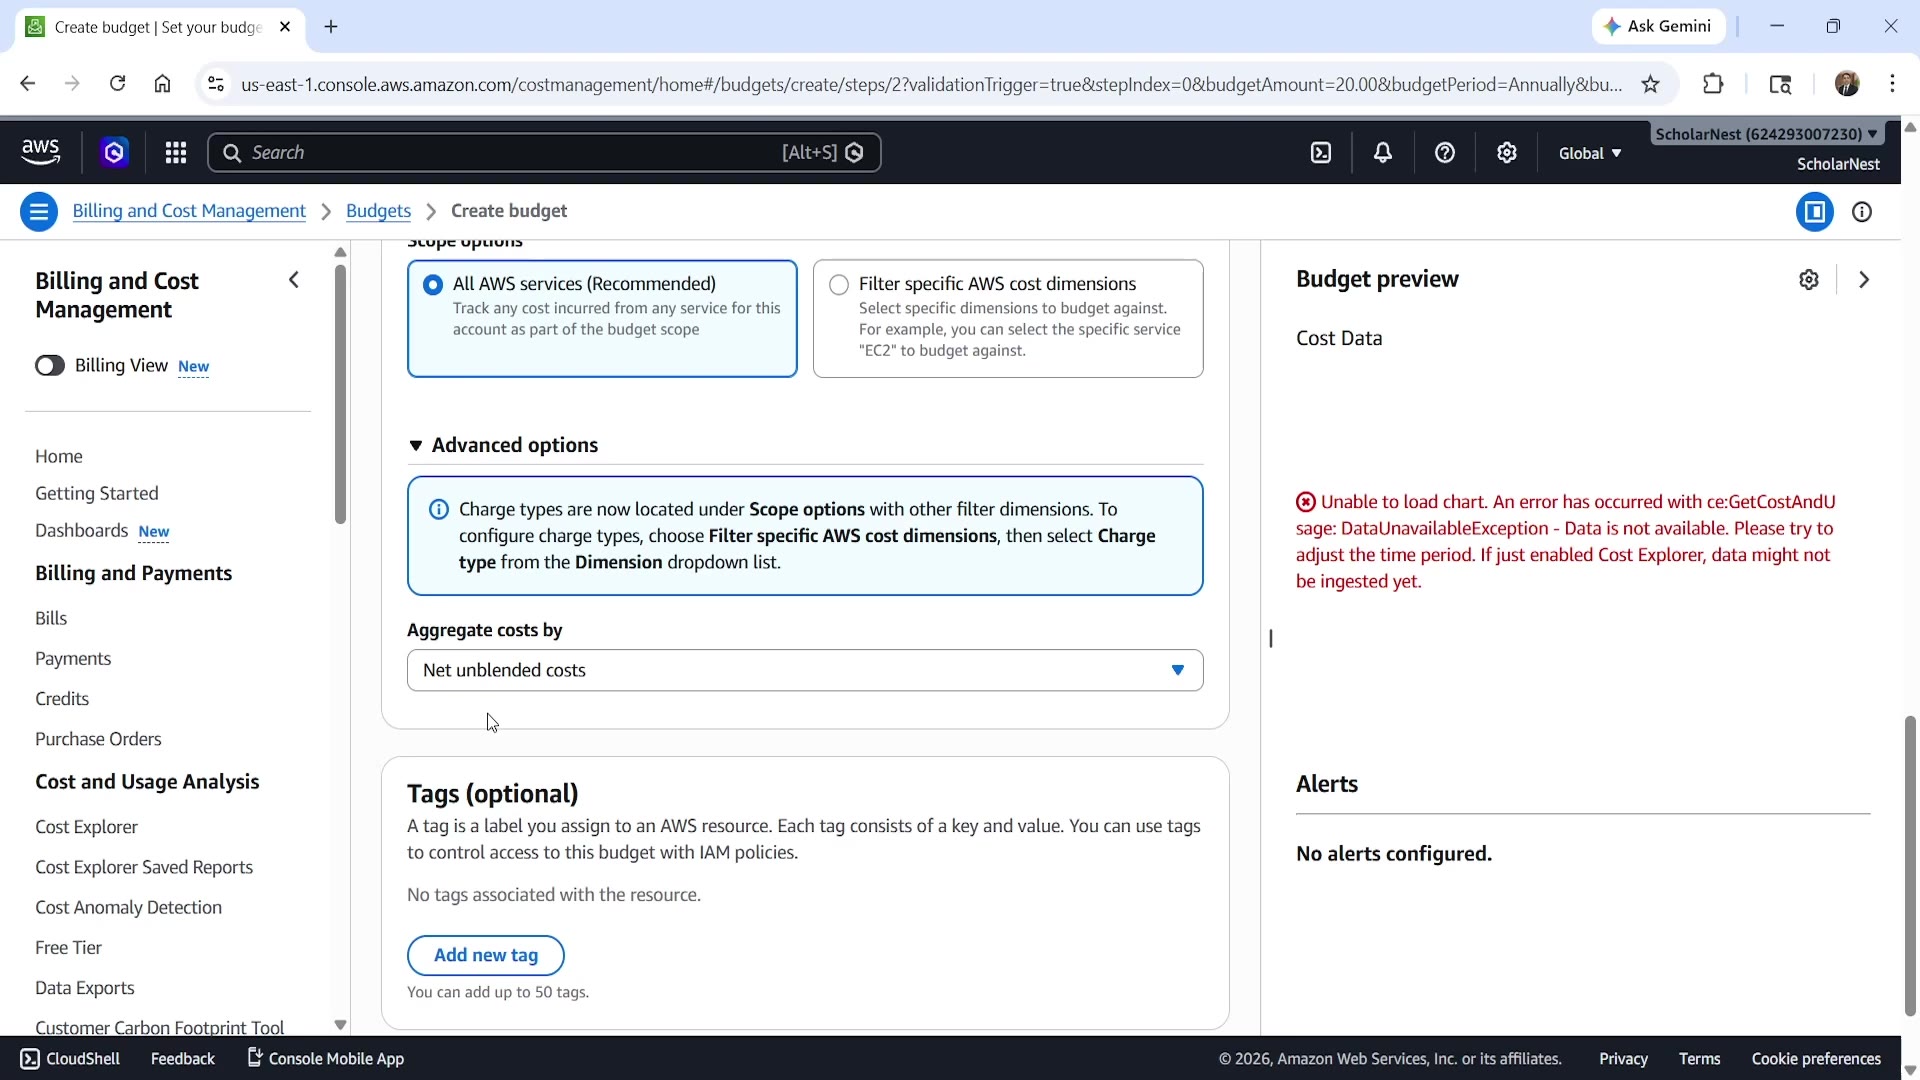 Cost aggregation setting
Under Aggregate costs by, you have a choice — commonly between Net unblended costs and Unblended costs:
- Net unblended cost calculates your cost after deducting your credits. This means your net cost stays at $0 until you've fully used up your $100 free credit — and only then does it start counting toward your $20 budget. This is what we want, since our goal is to be alerted only after the free credit runs out.
- Unblended cost would count your total spending without deducting credits — meaning the budget could trigger even while you're still within your free credit.
So, we set Aggregate costs by → Net unblended costs, and our budgeted amount stays at $20 — this correctly represents "$20 of real spending, after my $100 credit is used up."
Set an Alert Threshold
Next, configure when you want to be alerted:
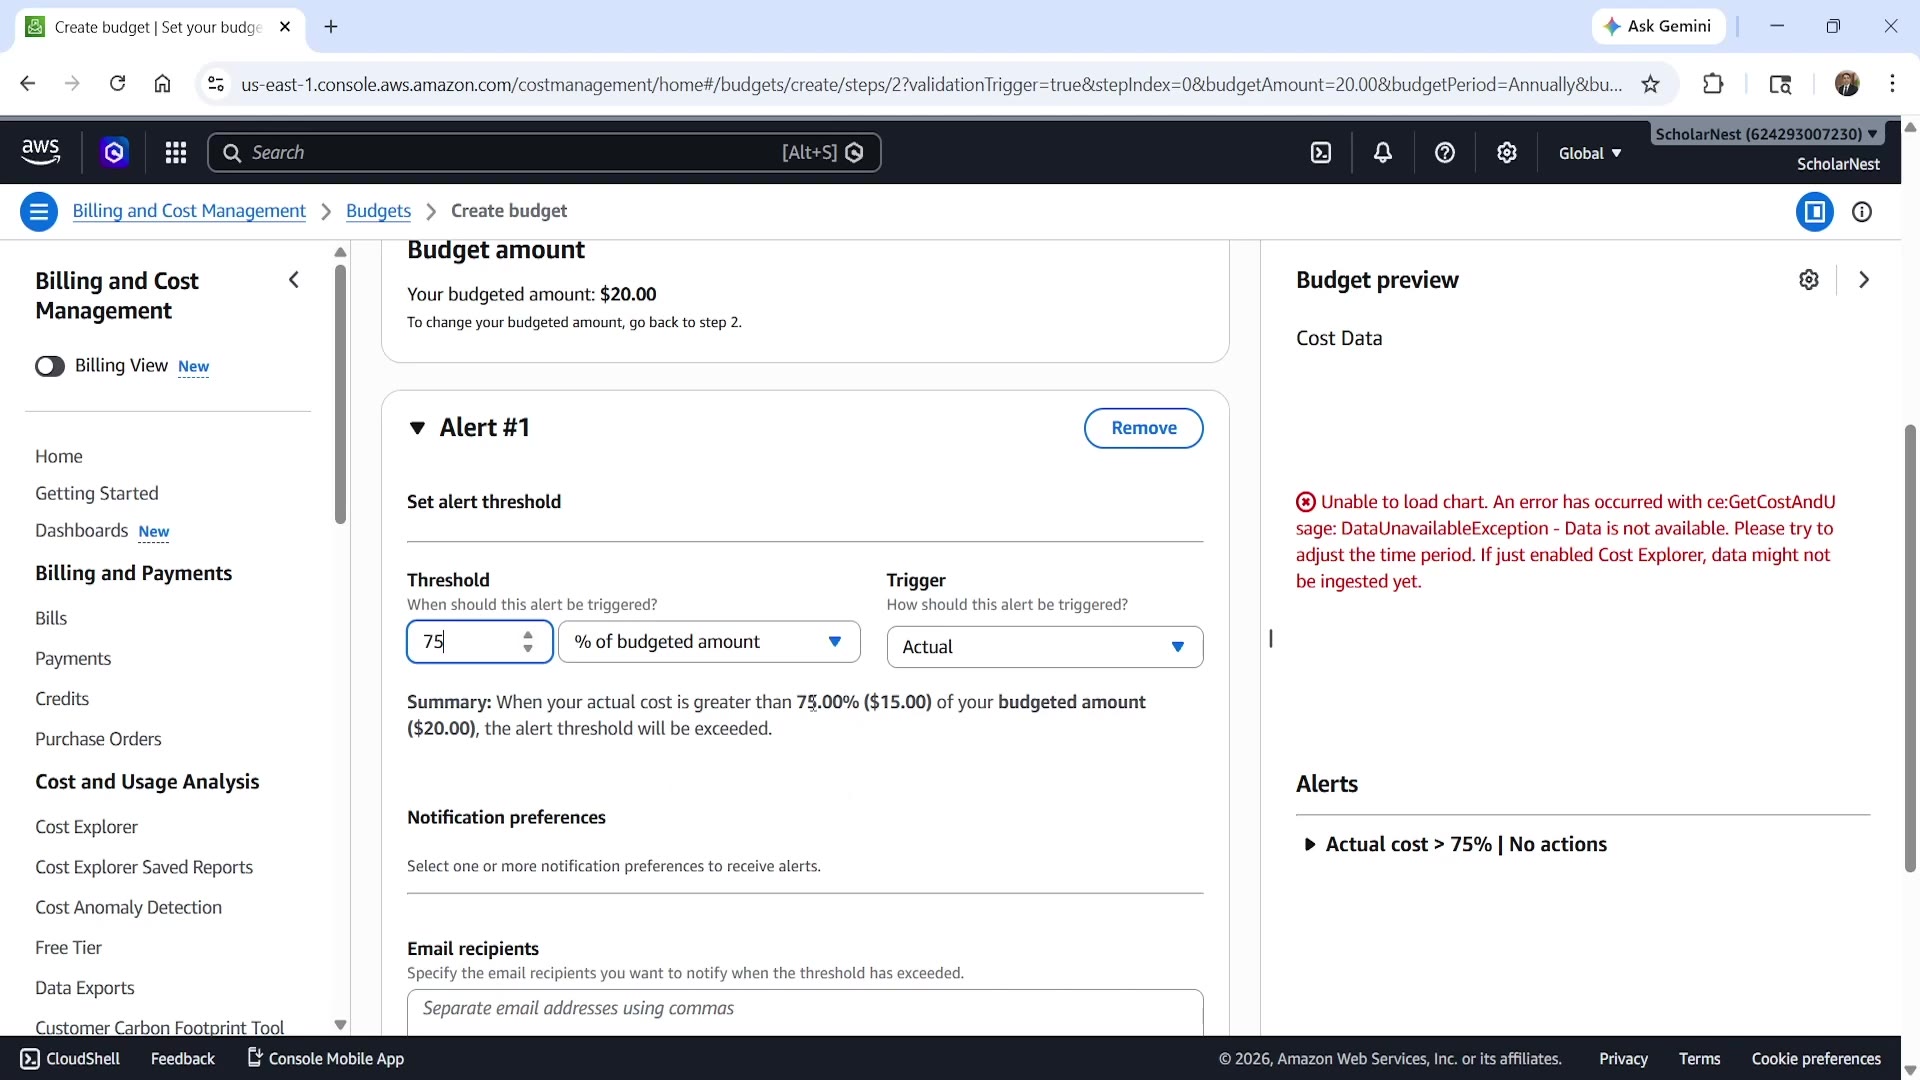 Budget alert threshold
- Threshold: We set this to 75% of the budgeted amount.
- Since our budget is $20 (net, after credits), 75% works out to $15 — so the alert triggers once our actual net spending crosses $15.
- Trigger: Choose Actual (rather than forecasted) spending as the trigger.
- Notification: Add your email address here — AWS will send you an alert as soon as this threshold is crossed.
You can add more alerts if needed, but for most learners, one alert is enough — extra alerts are mainly useful if you've set up Amazon SNS or a chatbot integration for notifications.
Review and Create
On the review screen, you'll see a summary of everything — no budget actions are configured (we don't need them; the email alert is enough for us to take manual action when needed). Click Create budget.
That's it — your budget is live. You'll see it listed with its health status (Healthy), the $20 budget amount, and current spending compared to it.
Summary
| Setting | Value We Used | Why |
|---|---|---|
| Period | Annually | Covers the whole course |
| Renewal | Recurring | No need to recreate next year |
| Budgeting method | Fixed | Single tracked amount |
| Budget amount | $20 | The spending we allow beyond our $100 free credit |
| Aggregate costs by | Net unblended costs | Ensures credits are deducted before counting toward budget |
| Alert threshold | 75% ($15) | Early warning before hitting the full $20 |
| Trigger | Actual | Alerts based on real spend, not forecast |
With this in place, you'll get notified by email as soon as your spending approaches your budget — giving you time to check what's running and take action, without any surprise bills.
See you again. Keep learning, and keep growing!