Ingesting Data to Bronze Layer from a SaaS Application
In the previous lecture, we learned that Lakeflow Connect's SaaS application pattern is the simplest of the two architecture shapes: Connection → Ingestion pipeline → Destination tables, all governed by Unity Catalog and running on serverless compute. In this lecture, let's actually build one — ingesting data from GitHub (used here as our SaaS application example) straight into our Bronze layer.
The Roadmap
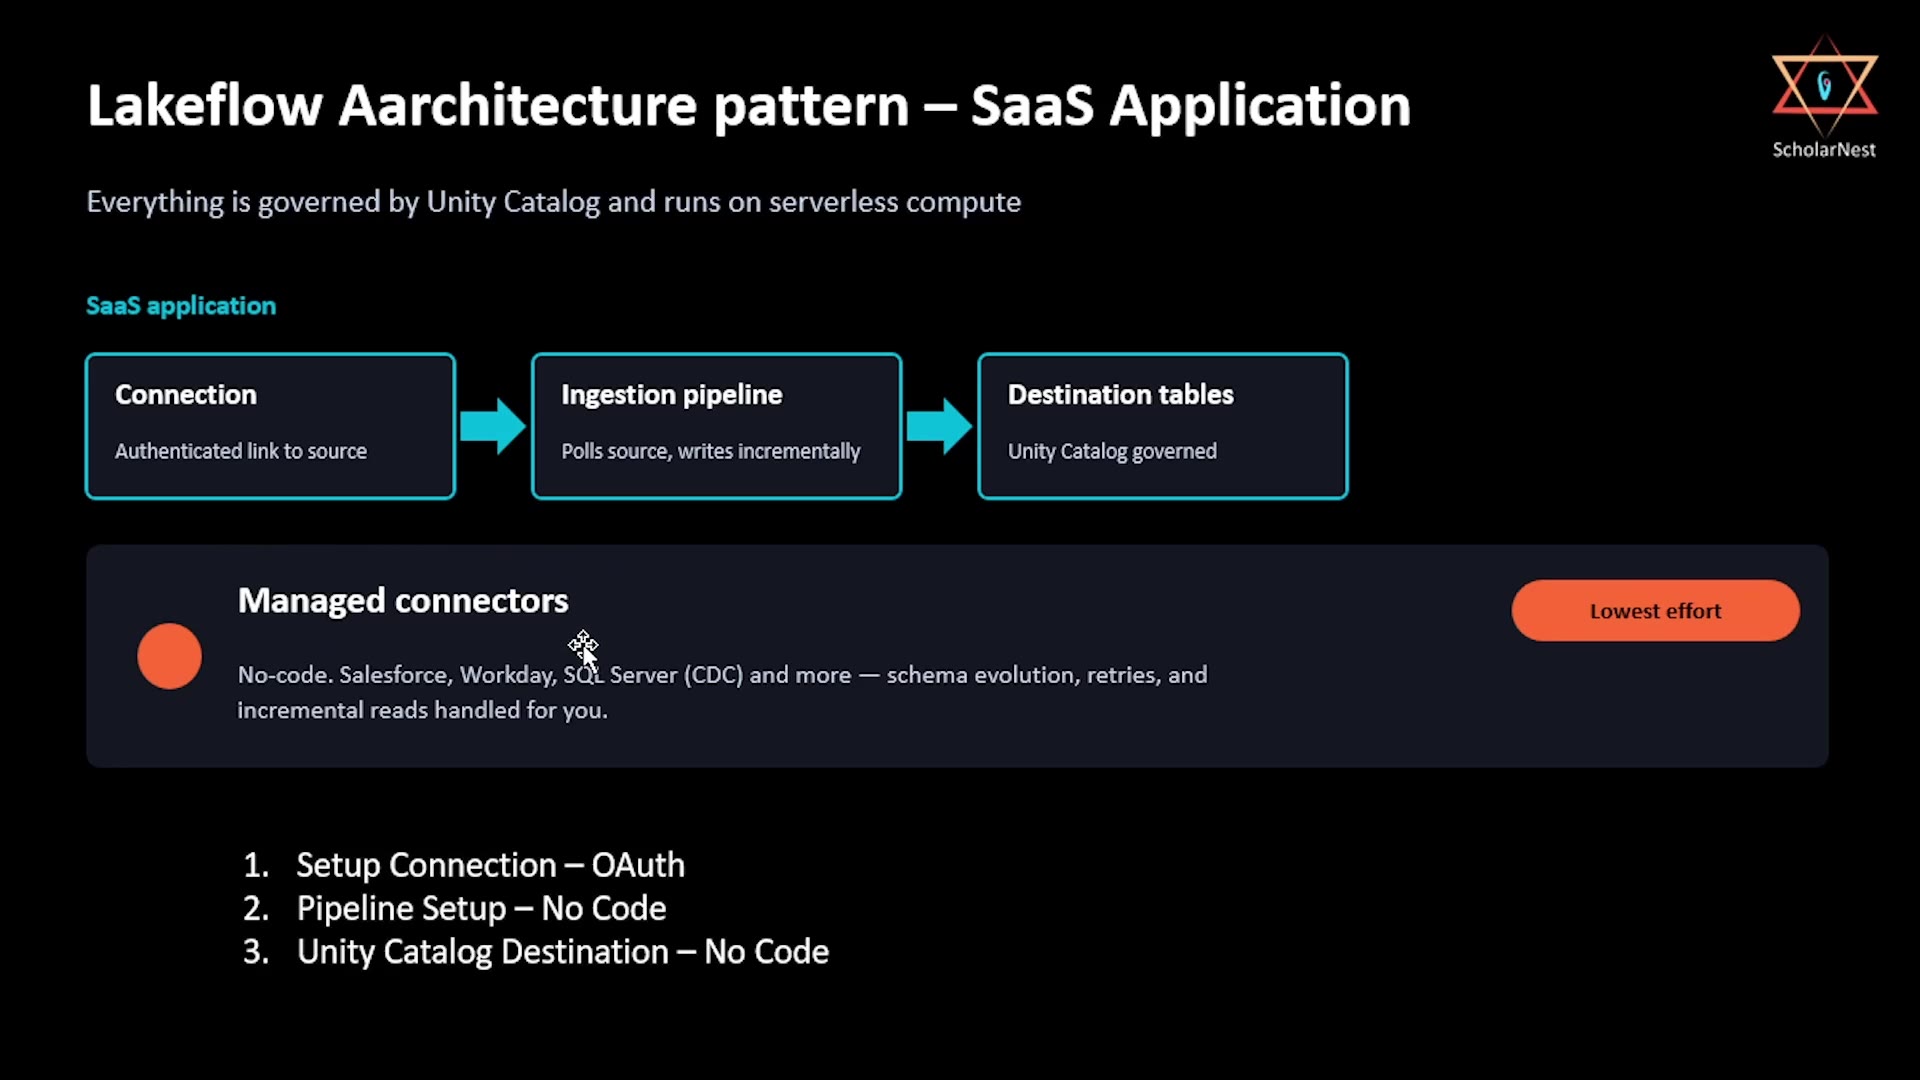 SaaS application architecture roadmap
This is a managed connector — the lowest-effort tier — so the whole process breaks down into three concrete steps:
- Setup Connection — OAuth
- Pipeline Setup — No Code
- Unity Catalog Destination — No Code
Let's walk through each.
Step 1: Register a GitHub OAuth App
Before Databricks can pull data from GitHub on your behalf, GitHub needs to know it's allowed to. This means registering an OAuth app.
In your GitHub account, go to Settings → Developer settings → OAuth Apps → New OAuth App:
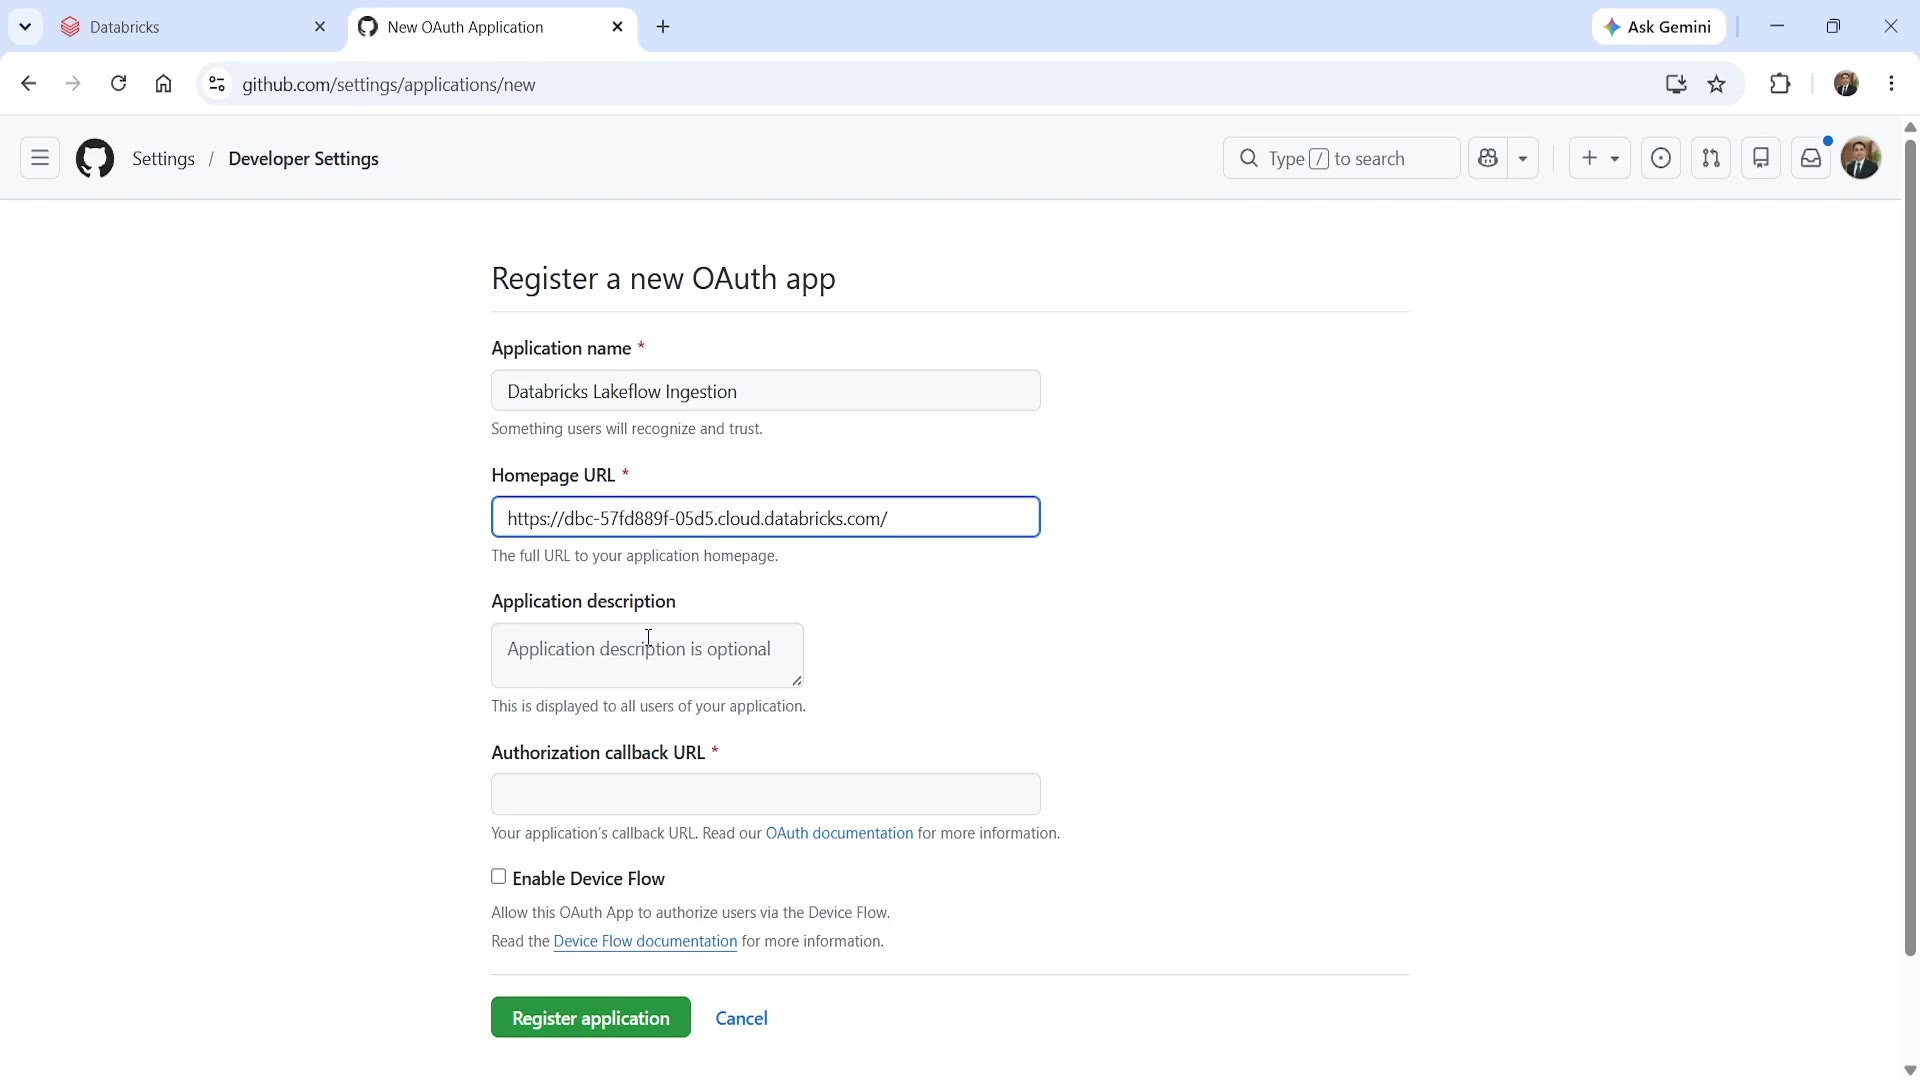 GitHub OAuth app registration form
Fill in:
- Application name — something recognizable, e.g., "Databricks Lakeflow Ingestion."
- Homepage URL — your Databricks workspace URL (e.g.,
https://dbc-xxxxxxxx.cloud.databricks.com/). - Application description — optional, but useful for your own documentation (e.g., "App to ingest GitHub commits and issues into Databricks").
- Authorization callback URL — this is important, and it's specific to Databricks: it follows the pattern
https://<your-workspace-url>/login/oauth/lakeh...— Databricks will show you the exact URL to use for this field.
Click Register application. GitHub generates a Client ID and lets you generate a Client Secret for this app. Copy both — you'll need them in the next step. (Treat the Client Secret like a password — don't share it or paste it anywhere public.)
Step 2: Create the Connection in Databricks
Back in Databricks, go to Data Ingestion, and start a new ingestion from GitHub. This opens a guided, multi-step wizard — "Ingest data from GitHub."
Step 1 of 5 — Connection:
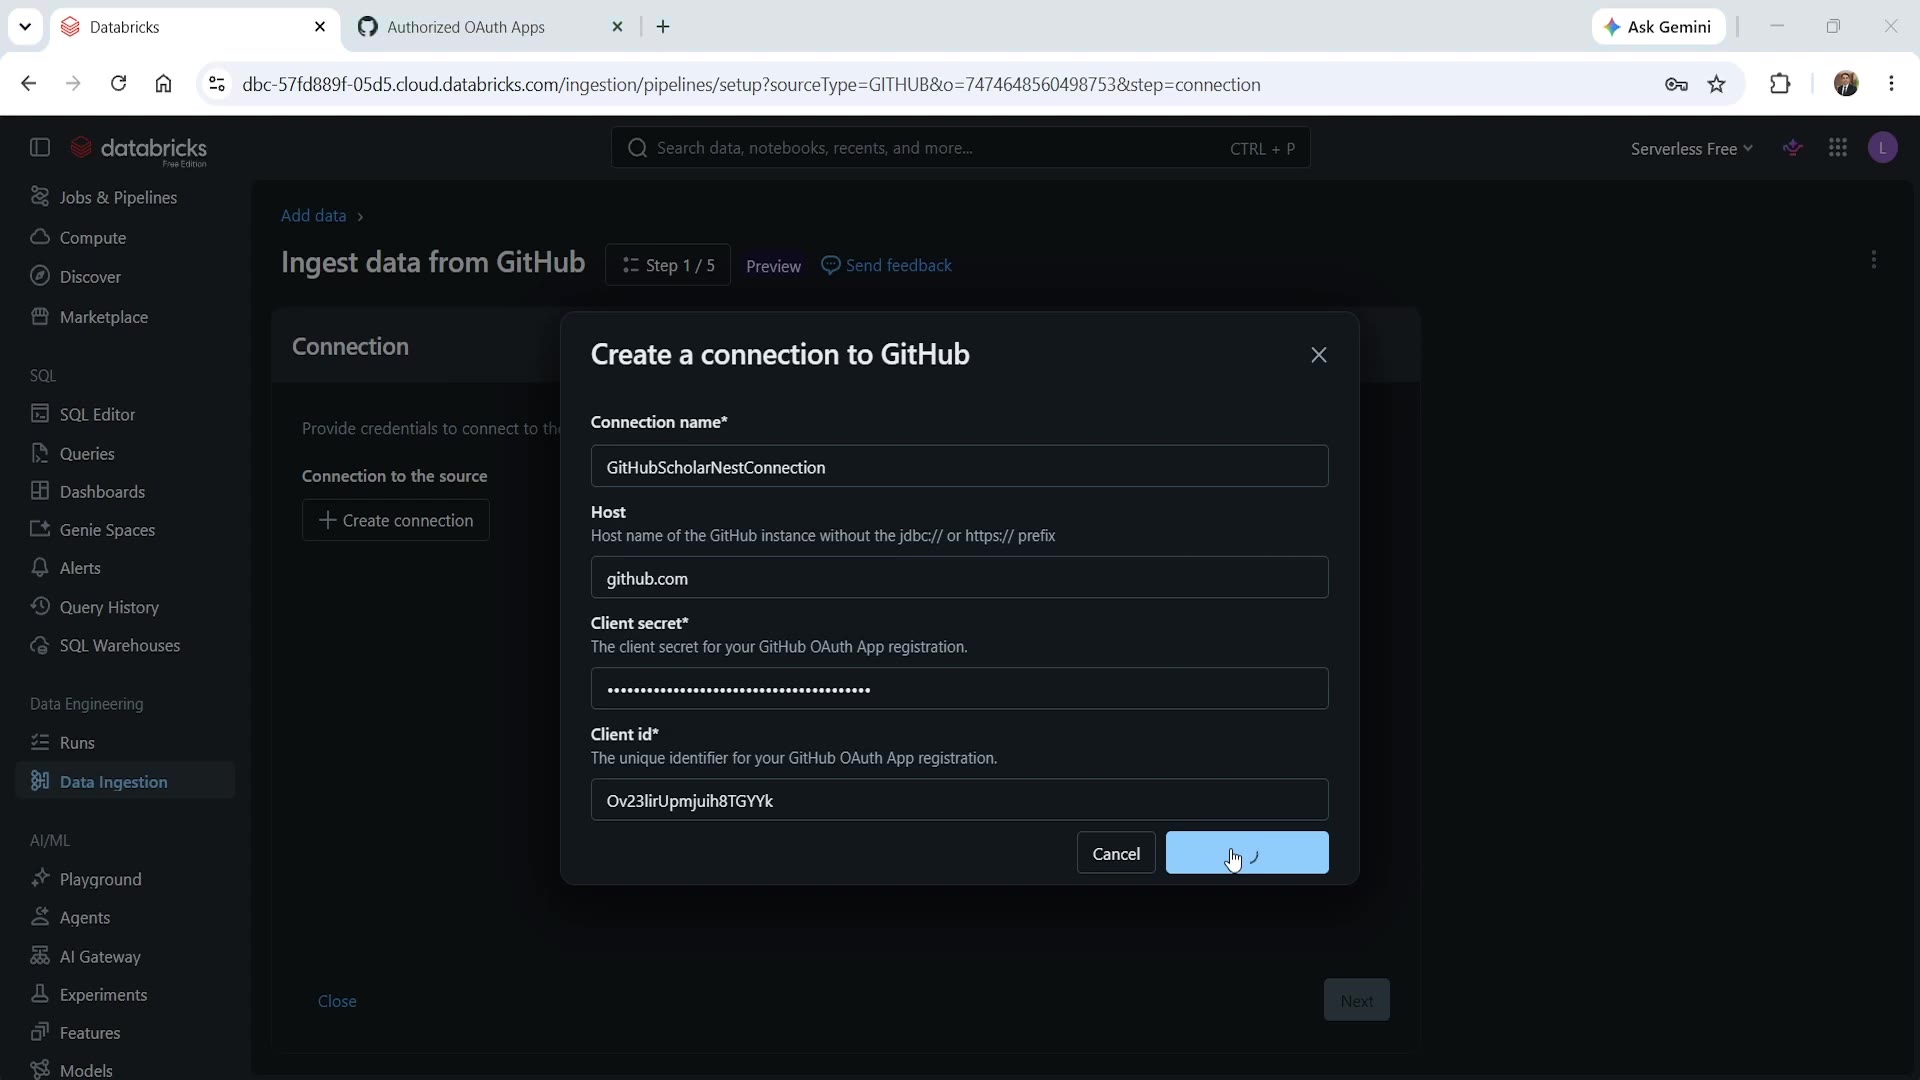 Databricks — Create a connection to GitHub
- Connection name — a name for this connection (e.g., "GitHubScholarNestConnection").
- Host — just
github.com(no protocol prefix). - Client secret — paste the secret you generated in Step 1.
- Client id — paste the Client ID from Step 1.
Once submitted, Databricks will redirect you through a GitHub authorization flow — you'll confirm access (including any 2FA/verification step your account requires), and the connection gets created.
Step 3: Choose What Data to Ingest
Step 3 of 5 — Source:
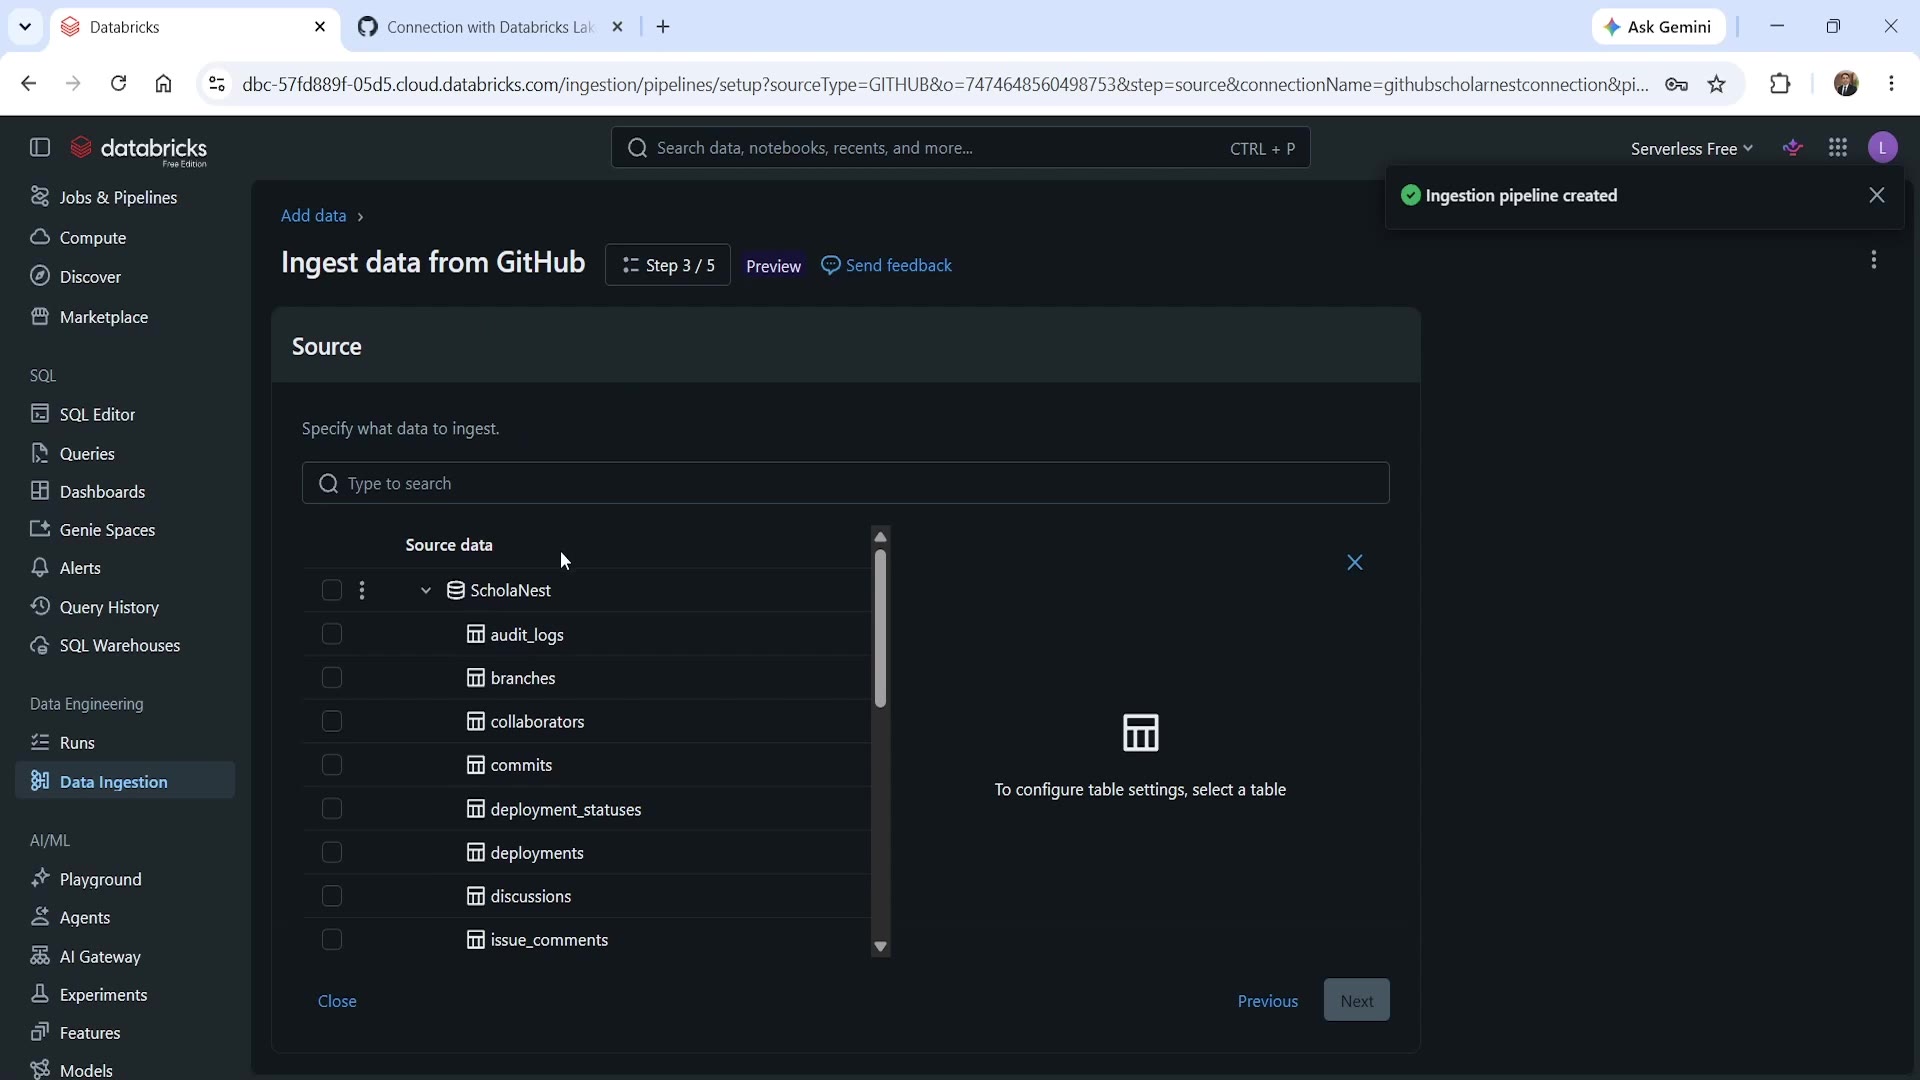 Source selection — available GitHub tables
Once connected, Databricks shows you the full list of objects available from your GitHub source — a genuinely wide catalog, including audit_logs, branches, collaborators, commits, deployment_statuses, deployments, discussions, issue_comments, and more.
For this demo, select commits and issues — two of the most commonly useful GitHub objects for engineering analytics. You can select multiple objects for ingestion in a single pipeline.
Step 4: Choose the Destination
Step 4 of 5 — Destination:
Specify where in Unity Catalog the ingested data should land — your target catalog and schema (in this course, dev.dbx_course). This is genuinely "no code" — you're simply picking a destination from a list of catalogs and schemas you already have access to, exactly the same governed structure we built in the Unity Catalog chapter.
Step 5: Schedule and Run
Step 5 of 5 — Settings: name your pipeline (e.g., github_demo), and choose a schedule — for example, run it manually for now, or set up a recurring schedule for production use. Click Save and continue, and then run the pipeline.
Verifying the Result
Once the pipeline runs, Databricks shows a live execution graph:
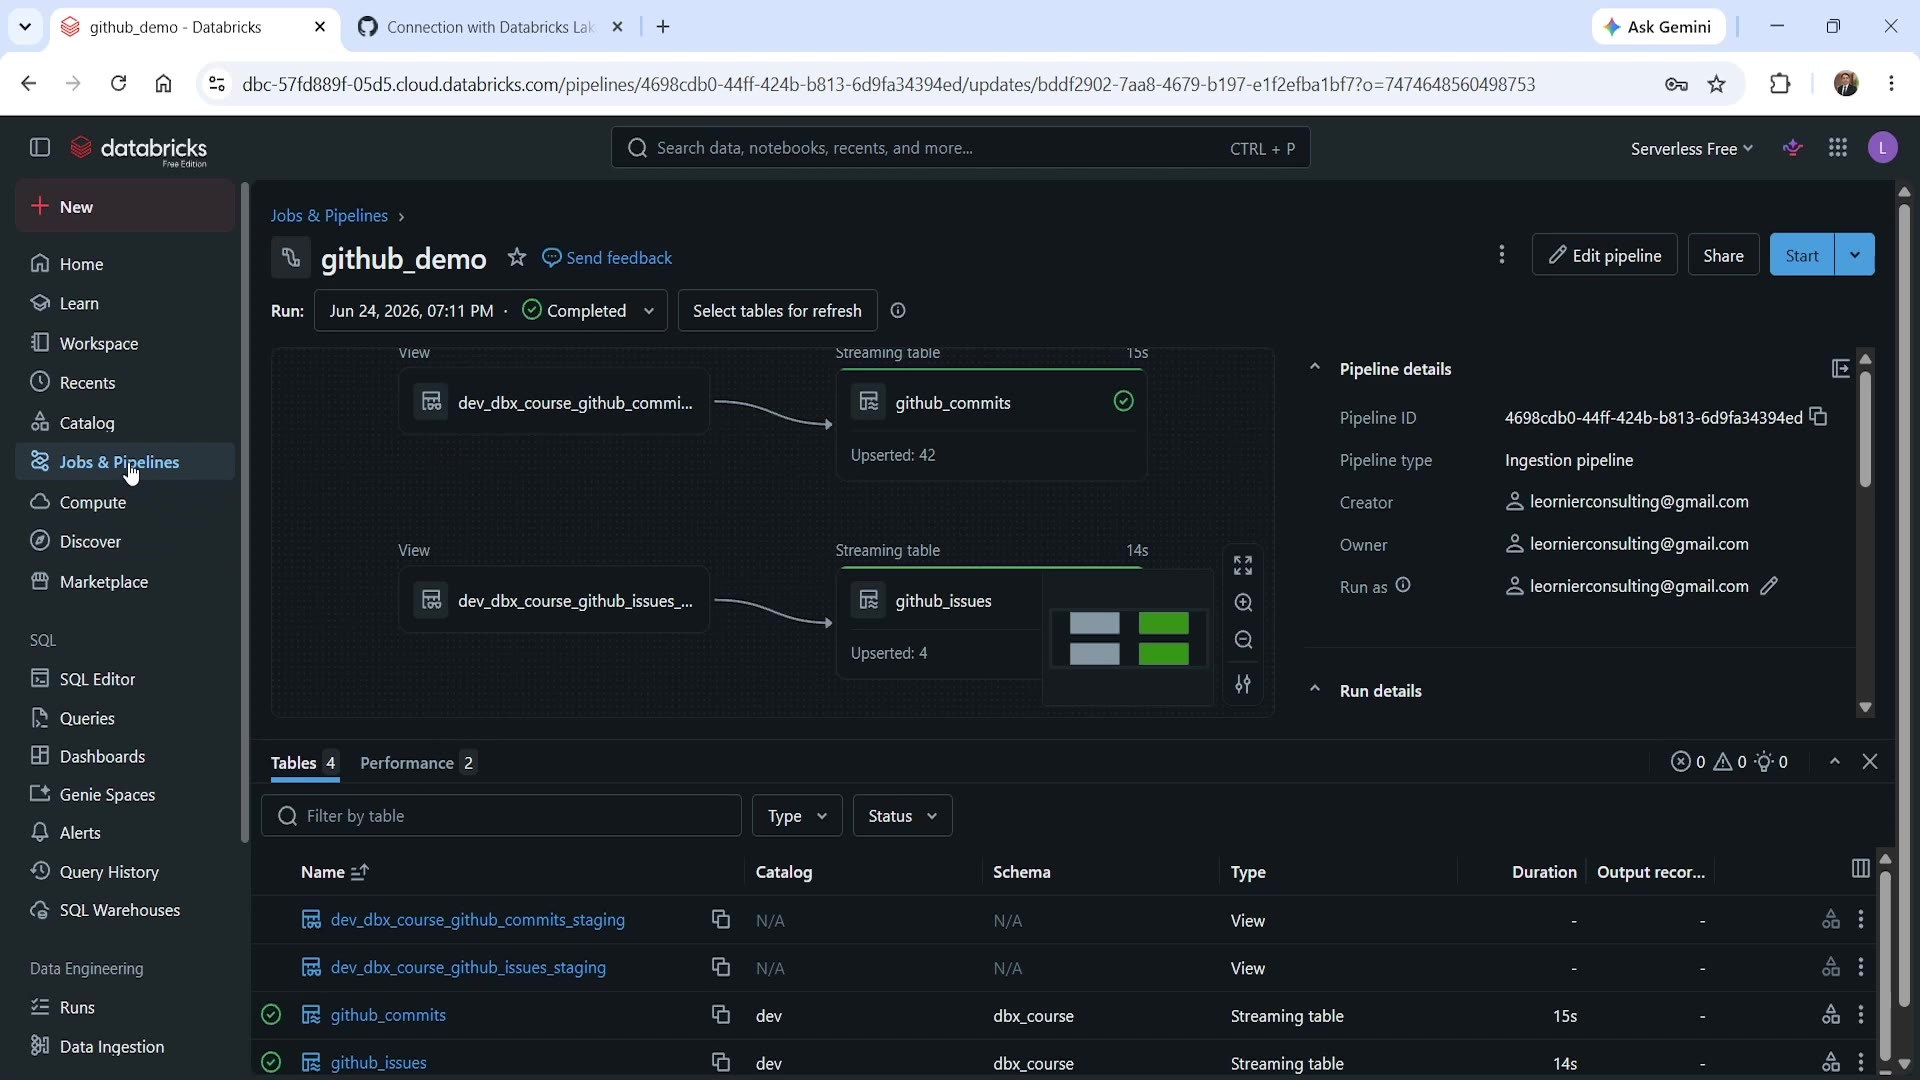 Ingestion pipeline — completed run
You can see the pipeline structure clearly: staging views (dev_dbx_course_github_commits_staging, dev_dbx_course_github_issues_staging) feeding into streaming tables (github_commits, github_issues). The run status shows Completed, with row counts confirmed — github_commits upserted 42 rows, github_issues upserted 4 rows.
Notice the tables are marked as "Streaming table" type — this is Lakeflow Connect's incremental ingestion mechanism at work, tracking what's already been ingested so future runs only pick up new or changed records.
Verify With SQL
Back in a notebook, we can confirm the ingested data directly:
sqlSELECT count(*) AS total_issues FROM dev.dbx_course.github_issues;
sqlSELECT number, title, state, created_at FROM dev.dbx_course.github_issues ORDER BY created_at DESC
sqlSELECT sha, author_name, committer_date, LEFT(message, 80) AS commit_message_preview FROM dev.dbx_course.github_commits ORDER BY committer_date DESC LIMIT 10;
These are ordinary Unity Catalog tables now — queryable with plain SQL, just like any table we've built by hand throughout this course. dev.dbx_course.github_issues and dev.dbx_course.github_commits sit right alongside our earlier Bronze/Silver/Gold tables in the same schema, ready to be brought into the Medallion pipeline as a new Bronze source.
Summary
| Step | What Happens |
|---|---|
| 1. Register OAuth app (GitHub) | Creates a Client ID + Client Secret, authorizing Databricks to access your GitHub account |
| 2. Create connection (Databricks) | Authenticates using the Client ID/Secret; completes GitHub's authorization flow |
| 3. Choose source objects | Select which GitHub tables to ingest (e.g., commits, issues) from a full catalog of available objects |
| 4. Choose destination | Pick the Unity Catalog catalog/schema the data should land in — fully governed, no code |
| 5. Schedule and run | Name the pipeline, set a schedule, and execute — Databricks handles incremental "streaming table" ingestion automatically |
This is the managed connector experience end to end: no custom ingestion code, no manual schema mapping, no retry logic to write yourself — exactly the "lowest effort" tier we covered in the previous lecture, now seen in practice.
See you again. Keep learning, and keep growing!